Blackout
Blackout allows specific live linearRepresents a timeline that identifies content and when it should be played. This allows content to be streamed to viewers according to a predefined schedule. programming to be blacked out to predefined sets of viewers (aka audiences). Instead of standard programming, blacked out viewers will view slate, a different live channel, on-demand content, or content sourced from a different Live Slicer. Use this capability to prevent the infringement of broadcasting rights.
The following sample scenarios illustrate common use cases:
-
Scenario #1:
A national broadcaster's live channel contains a live sporting event. However, a local broadcaster has superior rights to this event.
Solution: Blackout may be used to limit the distribution of this sporting event to the local broadcaster.
-
Scenario #2:
A movie or TV show that has not been licensed for distribution over the Internet has been scheduled in a live channel.
Solution: Blackout may be used to prevent the distribution of this restricted content over the Internet.
How Does It Work?
Apply blackout to programs as needed. Blacked out viewers will stream alternate content.
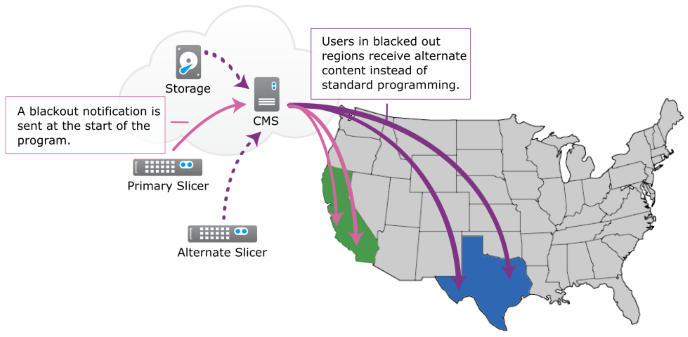
Blackout Notification
At the start of a program that requires blackout, an ID (i.e., blackout_id) must be sent to the Live Slicer. This ID should identify a rule that has been associated with the live channel. This rule identifies an audience (i.e., a grouping of viewers) and whether the regularly scheduled program or alternate content will be streamed to those viewers.
Streaming Request
A viewer requests a live channel's programming through a custom media player. The response sent to the media player is a URL that varies according to whether blackout is applicable. Blackout will be applied when all of the following conditions are true:
- Blackout ID: A blackout ID has been defined for the requested programming.
- Live Channel: The live channel has been configured to apply one or more blackout rules for the blackout ID associated with the requested programming.
-
Viewer: The viewer satisfies the criteria defined within the audience for the aforementioned blackout rule(s). This criteria consists of location information (i.e., zip code, DMA, or country), IP address, and/or device.
If all of the above conditions are true, then the first applicable blackout rule determines the alternate content that will be streamed to the viewer. Otherwise, the regularly scheduled program will be streamed to the viewer.
Blackout is applied on a per program basis. If a blackout ID is not provided with the channel's next scheduled program, then all viewers will be allowed to play it back. Otherwise, the above workflow determines the type of content that each viewer will stream.
The above workflow is illustrated below.

Setup
Setting up blackout requires:
- Defining one or more audiences.
- Defining one or more blackout rules.
- Setting up blackout on the desired live channel.
- Setting up a media player.
- Sending a blackout notification to the Live Slicer.
Audiences
An audience identifies viewers that will be blacked out via one or more of the following criteria:
- IP address: Specify an IP address (IPv4) or subnet (CIDR notation).
- Zip code: Specify a 5 digit United States zip code.
-
Designated market area (DMA): Specify a United States DMA by its ID.
- Device: Specify a name or description for the desired device. Values defined within the Devices option will be compared against the value defined for the repl.cbdevice playback URL parameter.
-
Country: Specify a two character country code (ISO 3166).
Country codes are automatically capitalized.
A viewer's location (i.e., zip code, DMA, and country) is either automatically determined by IP address or manually defined in the playback request.
Learn more.
Factors, such as proxy services, VPNs, and the nature of geolocation technology, may result in an inaccurate assessment of a viewer's zip code or DMA when calculating location information by IP address. In turn, this may incorrectly allow viewers access to content that should have been blacked out. Therefore, it is strongly recommended to utilize a device's location services to identify a viewer's location and then submit this information when a media player requests a stream.
Learn more.
The Match option determines whether a viewer must meet any, all, or none of the specified criteria in order to qualify as a member of the current audience.
-
Any: This match condition requires that a viewer satisfy at least one entry within one or more categories.
Example:
If an audience has been configured to match on zip codes, country codes, and DMAs, a viewer will qualify for membership when the request originates within one of the specified zip codes, country codes, or DMAs.
-
All: This match condition requires that a viewer satisfy at least one entry within each category that has been defined.
Example:
If an audience has been configured to match on zip codes, country codes, and DMAs, then a viewer will only qualify for membership when the request originates within one of the specified zip codes, country codes, and DMAs. If the request does not satisfy all of the defined categories, then it will not qualify for membership.
-
None: This match condition requires that a viewer not satisfy any entries within the categories that have been defined.
Example:
If an audience has been configured to match on zip codes, country codes, and DMAs, then a viewer will only qualify for membership when the request does not originate within any of the specified zip codes, country codes, and DMAs. If the request satisfies any of the defined categories, then it will not qualify for membership.
To set up a basic audience
-
Navigate to the Audiences page.
 How?
How? - Click + Create Audience.
- In the Audience Name option, type the name by which this audience will be identified.
-
Under the Type option, verify that the Single mode has been selected.
The Multiple mode allows you to create a group of audiences.
Learn more. - Click Create & Edit.
-
In the Match option, select whether a viewer will qualify for membership when the request matches any, all, or none of the specified criteria.
-
Add the desired IP addresses, zip codes, designated market areas (DMAs), devices, and/or country codes.
- Click + under the desired category.
- Type one or more entries. Multiple entries should be separated by a comma (e.g., 90405,90503,90210).
- Click Add.
- Repeat steps i - iii for each desired category.
- Click Save to update the audience configuration with these changes.
Grouping Audiences
Multiple audiences may be grouped together. This allows you to apply a blackout rule to multiple audiences.
Sample Scenario
You have created an audience for each major metropolitan area in a state. However, you would like to apply blackout to the entire state. You can accomplish this by creating a superaudience that groups together metropolitan-specific audiences for that state.
To set up a superaudience
-
Navigate to the Audiences page.
- Click + Create Audience.
- In the Audience Name option, type the name by which this audience will be identified.
- Under the Type option, verify that the Multiple mode has been selected.
- Click Create & Edit.
-
In the Match option, select whether a viewer will qualify for membership when the request matches any, all, or none of the specified audiences.
- Add each desired audience by selecting it from the Available Audiences list and then clicking >.
- Click Save to update the audience configuration with these changes.
Blackout Rules
A blackout rule defines when and how a blackout will be applied to blacked out content. Specifically, it:
- Identifies viewers via an audience or superaudience.
-
Determines the alternate content that will be streamed to blacked out viewers. This alternate content may consist of either:
- Slate
- A different live channel
- On-demand content (CMS asset)
- Content sourced from an alternate Live Slicer.
To create a blackout rule
-
Navigate to the Rules page.
How? - Click + Create Rule.
- In the Rule Name option, type the name by which this blackout rule will be identified.
- Click Create & Edit.
- From the Alternate Content Type option, choose the type of source for the alternate content that will be streamed to blacked out viewers.
Slate: Indicates that conditional blackout slate will be streamed to blacked out viewers.
Channel: Indicates that content sourced from an alternate live channel will be streamed to blacked out viewers.
Set the Alternate Content ID option to the desired channel IDThis unique ID identifies a live channel. View this ID by navigating to the Live Channels tab, selecting the desired live channel, and then viewing the GUID option from the Details tab.. or external ID (channel).
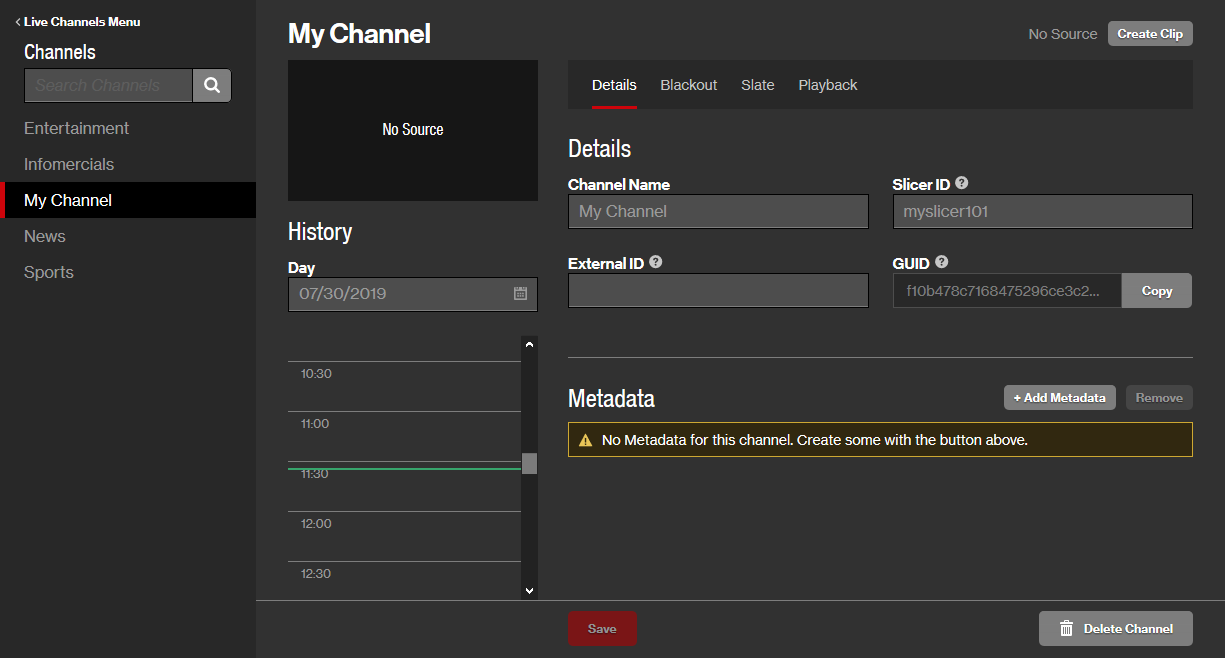
Where can I find a live channel ID?- From the CMS, click the Live Channels tab.
- Select the desired live channel. Basic options and live channel information will be displayed on the Details tab.
- Find the live channel's system-defined ID under the GUID label.
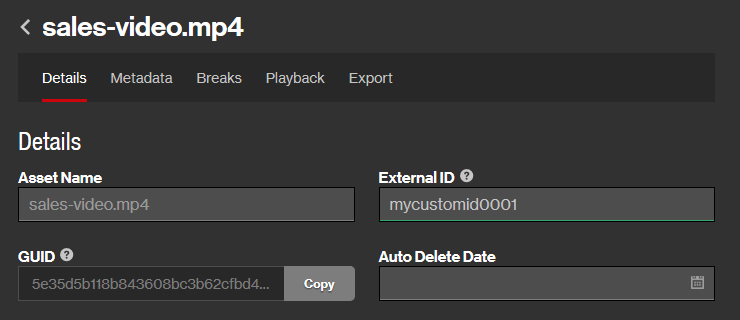
 Where can I find a live channel's external ID?
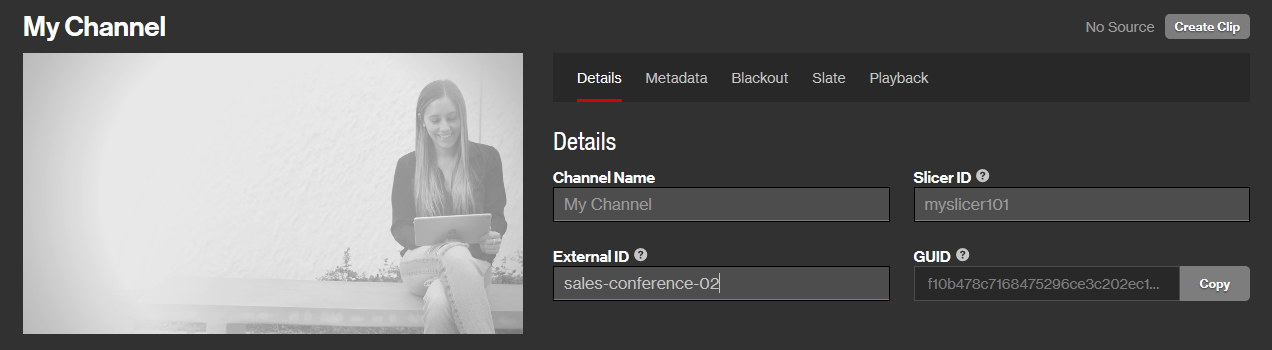
- From the CMS, click the Live Channels tab.
- Select the desired live channel. Basic options and live channel information will be displayed on the Details tab.
- The live channel's external ID is listed under the External ID option.
Asset: Indicates that on-demand content from the CMS library will be streamed to blacked out viewers.
Set the Alternate Content ID option to the asset ID or external ID for the desired CMS asset.
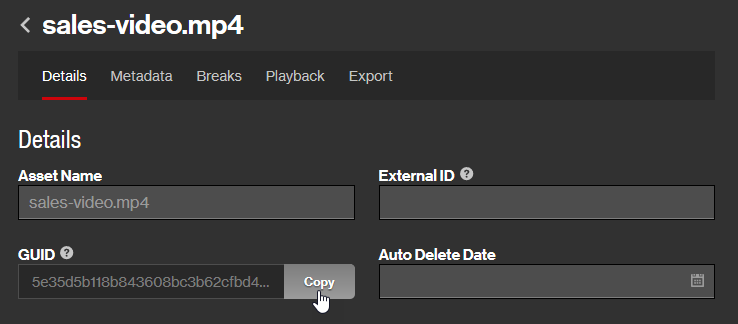
Where can I find an asset ID?- Navigate to the CMS library by clicking the Content tab.
- Select the desired asset.
- The asset ID corresponding to the asset selected in the previous step is listed under the GUID label.
 Where can I find an asset's external ID?
- Navigate to the CMS library by clicking the Content tab.
- Select the desired asset.
- The external ID corresponding to the asset selected in the previous step is listed under the External ID option.
Slicer: Indicates that media processed by an alternate Live Slicer will be streamed to blacked out viewers.
Set the Alternate Content ID option to the ID for the desired Live Slicer.
A Live Slicer's ID is defined by the slicerID parameter within its configuration file.
-
Use the Loop option to determine whether alternate content will be looped.
This option must remain enabled when broadcasting slate.
Disabling this option will broadcast slate when alternate content is shorter than the scheduled program.
- Optional. From the External ID option, type the external ID by which this blackout rule will be identified.
-
Click + Add Audience to display the Select Audience dialog box.
From the Available Audiences list, select the desired audience or superaudience and then click Select.
- Click Save to apply your changes to the blackout rule.
Live Channel
Set up a blackout configuration on a live channel by:
- Identifying when blackout should be triggered via a blackout ID.
- Associating blackout logic with the above blackout ID by adding blackout rules to it.
To configure blackout on a live channel
-
Navigate to the Audiences page.
-
Perform either of the following:
- Create a live channel by clicking + Create Channel, assigning it a name, and then clicking Create & Edit.
- Select an existing live channel.
- Click the Blackout tab.
-
Associate a blackout ID and blackout rules with the live channel.
- Click + Add Blackout ID.
-
In the Blackout ID option, type the blackout ID that identifies programming that should be blacked out.
- In the Description option, type a brief description for this blackout configuration.
- In the Rules option, select a blackout rule that identifies the audience and the alternate content that should be streamed when programming has been tagged with the above blackout ID. Click >.
- Repeat the previous step as needed.
- Click Done when you have added all of the desired blackout rules.
- Repeat the previous step for each desired blackout ID.
- Click Save to update the live channel configuration with these changes.
Setting up a Media Player
Standard programming will be broadcast to all users unless blackout is invoked in the playback URL.
Set up a media player to leverage blackouts as needed by including the following query string parameter in the playback URL:
Use a test player URL to quickly test your blackout configuration.
Sample Playback URL:
Setting a Viewer's Location or Device
By default, a viewer's location is determined by IP address. However, a viewer's device provides more accurate location information. Therefore, it is strongly recommended to override automatic location detection by including location information derived from the playback device. This information may then be set on the playback session by assigning it a DMA, zip code, and/or an IP address. Any applicable blackout zones will be assigned to the playback session based on this information.
Set a viewer's location or device by passing one or more of the following query string parameters to the playback URL:
| Type |
Parameter |
Description |
|---|---|---|
|
Country Code |
repl.cbcc=Country Code
|
Overrides automatic location detection and assigns the country code to the viewer's playback session. Replace Country Code with the desired country code as defined at: |
|
repl.cbdevice=Device Name
|
Defines the name or description of the device used for the viewer's playback session. Replace Device Name with the name or a brief description of the desired device. This value will be compared against the devices defined within applicable audience configurationsA device will only be compared against audience configurations that meet all of the following conditions: It has been assigned to a blackout rule. This blackout rule has been associated with a live channel via a blackout ID configuration. The requested program has been associated with the same blackout ID. . |
|
|
DMA |
repl.cbdma=DMA ID
|
Overrides automatic location detection and assigns a DMA to the viewer's playback session. Replace DMA ID with the ID of the desired DMA. |
|
IP Address |
repl.cbip=IP Address
|
Overrides automatic location detection and assigns an IP address to the viewer's playback session. Replace IP Address with the desired IP address (IPv4) or subnet (CIDR notation). |
|
Zip Code |
repl.cbzip=Zip Code
|
Overrides automatic location detection and assigns a zip code to the viewer's playback session. Replace Zip Code with the desired 5 digit United States zip code. |
Sample playback URL:
Live Linear Programming
An alternative method for triggering blackout is via a SCTE-35 message. Please contact Technical Support for more information.
Blackout may be applied to a program or an asset within a live channel. The method for applying blackout varies according to whether it is being applied to a program or an asset. However, both methods require a blackout ID (i.e., blackout_id) to be associated with the program or asset. This ID identifies the logic through which blackout will be applied. Specifically, a live channel's configuration associates a blackout ID with one or more blackout rules. Each of these blackout rules define the set of viewers that will be blacked out via an audience and the alternate content that will be streamed instead of the regularly scheduled program.
The first applicable blackout rule determines the alternate content that will be streamed.
Applying Blackout to a Program
Setting up blackout for use with a program requires assigning it a blackout ID. Set a blackout ID at the start of a program via the content_start method. This method accepts the meta request body parameter which allows metadata to be associated with the program being initiated. In this case, the blackout_id metadata field should be set to the desired blackout ID.
Example:
POST /content_start HTTP/1.1
{
			"meta": {
			"blackout_id": "br1"
			},
			"start_timecode": "00:15:21;09",
			"title": "Title",
			"external_id": "1A"
		}
Applying Blackout to an Asset
Blackout is only enforced on live channels. Therefore, blackout will only be applied to on-demand content when a viewer streams it via a live channel.
Blackout may only be applied to assets that have been assigned a blackout ID (i.e., blackout_id). No further configuration is required once this ID has been defined.
To assign a blackout ID to an asset
- From the Content tab, select the desired asset.
- Click + Metadata.
- In the Enter a key name option, type "blackout_id."
- Click Add.
- Set the new blackout_id metadata field to the desired blackout ID.
- Click Save.