This tutorial requires the Rules Engine feature. This feature must be purchased separately. For more information, please contact your CDN account manager.
Rules Engine customizes how HTTP requests are handled.
For example, it may be used to:
- Define a caching policy.
- Secure or even block the delivery of certain types of content.
- Modify request/response header data.
This tutorial guides you through the creation of the following three rules:
- A catch-all rule that defines a caching policy for all requests.
-
A rule that selectively overrides the caching policy defined in the catch-all rule.
The position of the second ruleRules are processed from top to bottom. Conflicting instructions are handled by giving precedence to the rule closest to the bottom that matches the request. allows it to override the first rule.
- A rule that denies unauthorized requests for content.
Creating a Catch-All Rule Tutorial
A rule may apply a default set of actions on all requests. This tutorial creates a rule that defines a default caching policy for all requests. This walkthrough consists of the following steps:
- Navigate to Rules Engine.
- Create a draft.
- Create a catch-all rule.
- Define a default caching policy.
- Convert a draft to a policy.
- Deploy a policy.
Step 1: Navigate to Rules Engine
Decide whether to customize how HTTP Large, HTTP Small, or ADN requests are handled.
Navigate to the Rules Engine page![]() How?
How?
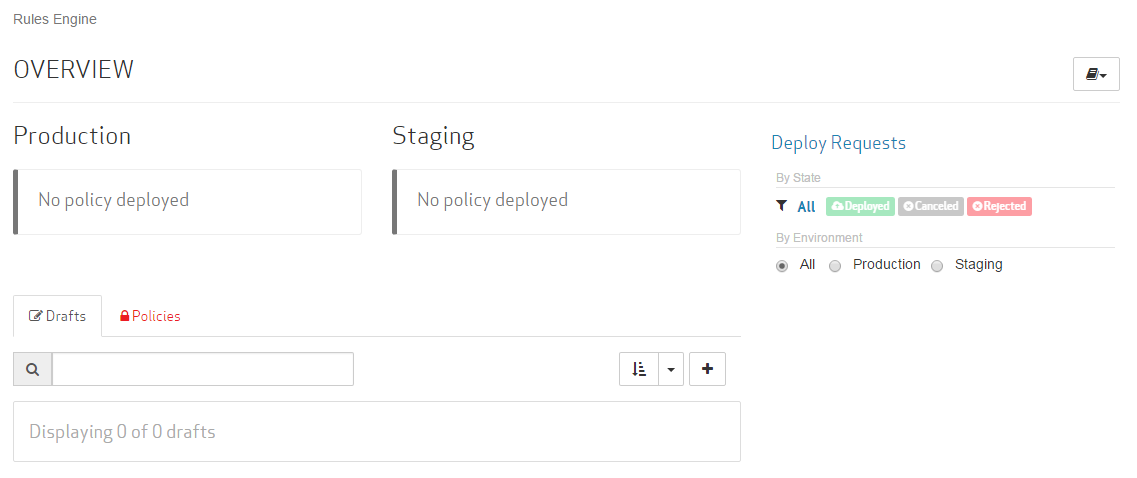
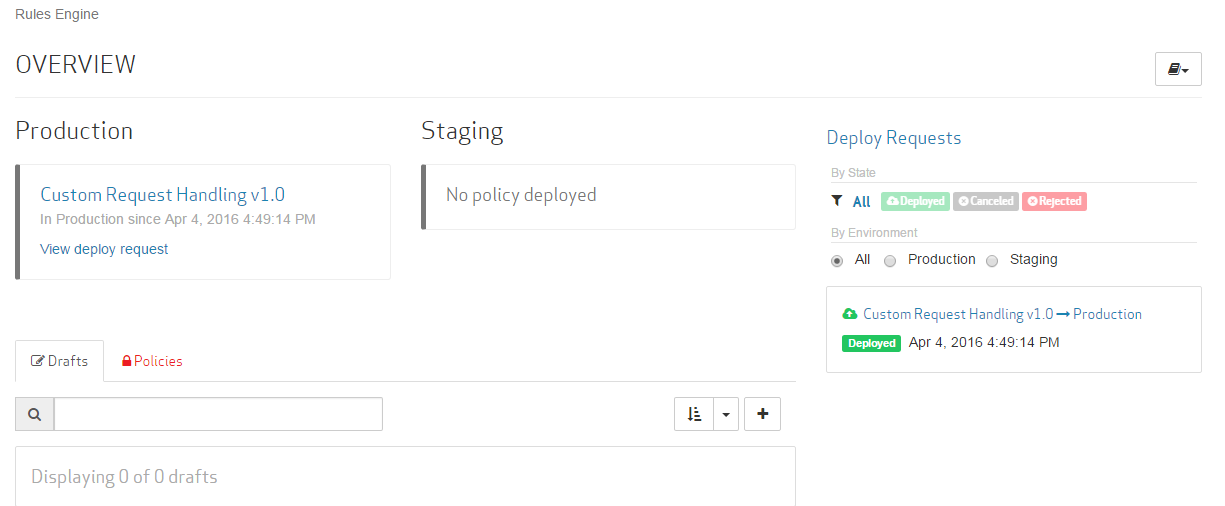
The landing page indicates the policies that have been applied to the Production and Staging environments, provides a listing of draftRules Engine: Refers to a working copy of one or more rules that identify requests and the set of actions that can be applied to them. Once a draft is completed, it should be finalized and converted into a policy.s and policies, and provides historical information on deploy requestRules Engine: Refers to a request to push out a policy to either the Staging or Production environment. This request triggers an automated review process. If a policy fails automated validation, then it will undergo manual review.s.
Get started with Rules Engine by creating a draft that identifies requests and how they will be handled.
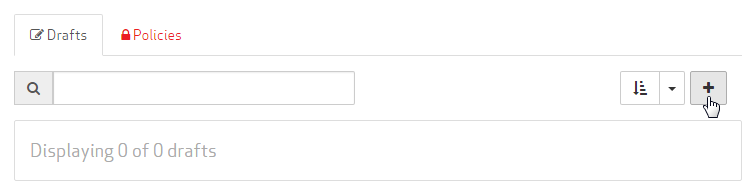
From the Drafts tab, click +.
A draft must be assigned a name before a configuration may be defined.
Set the name of the draft to "Custom Request Handing v1.0."

Click Continue to create the draft.
Step 3: Create a Catch-All Rule
Create a rule that applies to all requests by assigning it the "Always" match condition.
The default behavior defined by the "Always" match condition may be overridden. This will be shown later on in this tutorial.
Click + Rule.
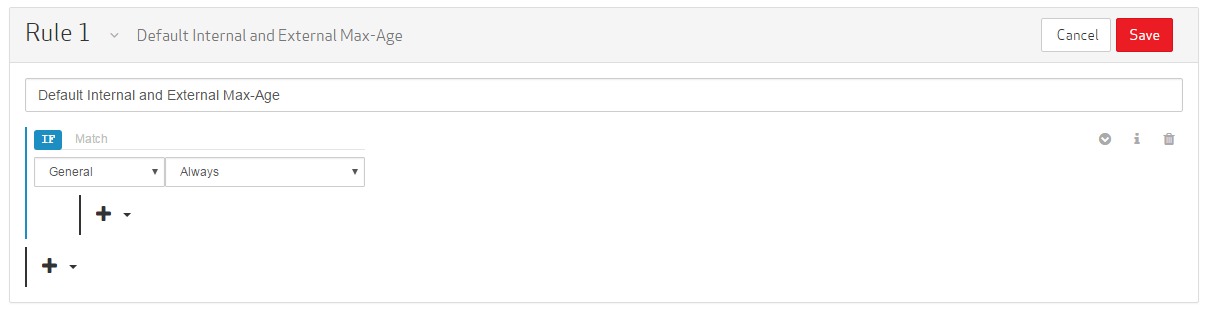
Assign a name to the rule by typing "Default Internal and External Max-Age."
Click ![]() and then select "Match."
and then select "Match."

Set the category to "General."
Set the match condition to "Always."
Step 4: Define a Default Caching Policy
Define a default caching behavior that instructs edge servers to check an origin server for a new version of an asset if six hours have passed since the asset was originally requested.
Directly below the match condition, click ![]() and then select "Feature." A new feature will be displayed directly below the match condition.
and then select "Feature." A new feature will be displayed directly below the match condition.
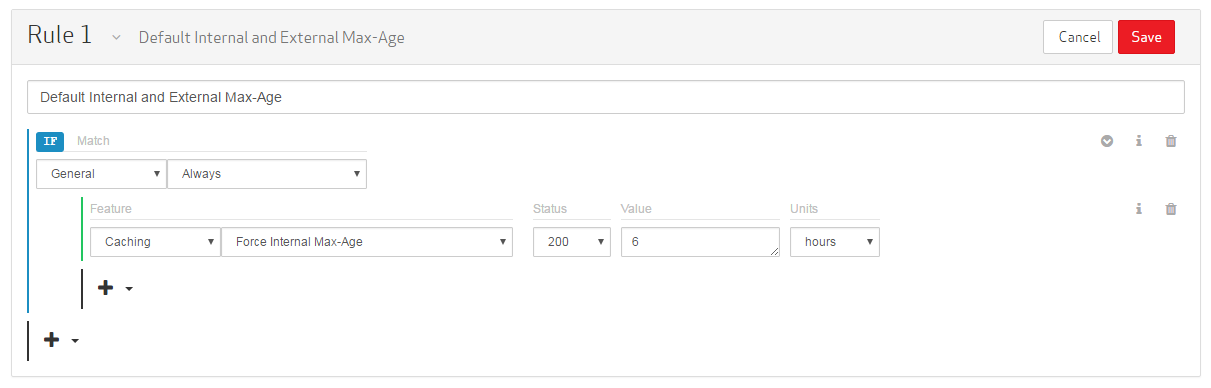
Set the category to "Caching."
Set the feature to Force Internal Max-Age.
Leave the Status option set to "200."
Set the Value option to "6." This value represents the amount of time that must pass before an edge server can check an origin server for new content.
Set the Units option to "hours."
Add the External Max-Age feature to the rule. This feature determines how much time must pass before a user agentRefers to software that acts on behalf of a user. For example, a web browser (e.g., FireFox, Chrome, and Internet Explorer) is a user agent. A web browser will make HTTP/HTTPS requests based on user actions (e.g., requesting a web site or clicking a link). (e.g., web browser) can check for an updated version of the requested content from an edge server.
Directly below the newly added feature, click ![]() and then select "Feature." A blank feature configuration will be displayed directly below the Force Internal Max-Age feature configuration.
and then select "Feature." A blank feature configuration will be displayed directly below the Force Internal Max-Age feature configuration.
Set the category to "Caching."
Set the feature to External Max-Age.
Leave the Status option set to "200."
Set the Value option to "6." This value represents the amount of time that must pass before a user agent (e.g., web browser) can check for an updated version of the requested content from an edge server.
Set the Units option to "hours."
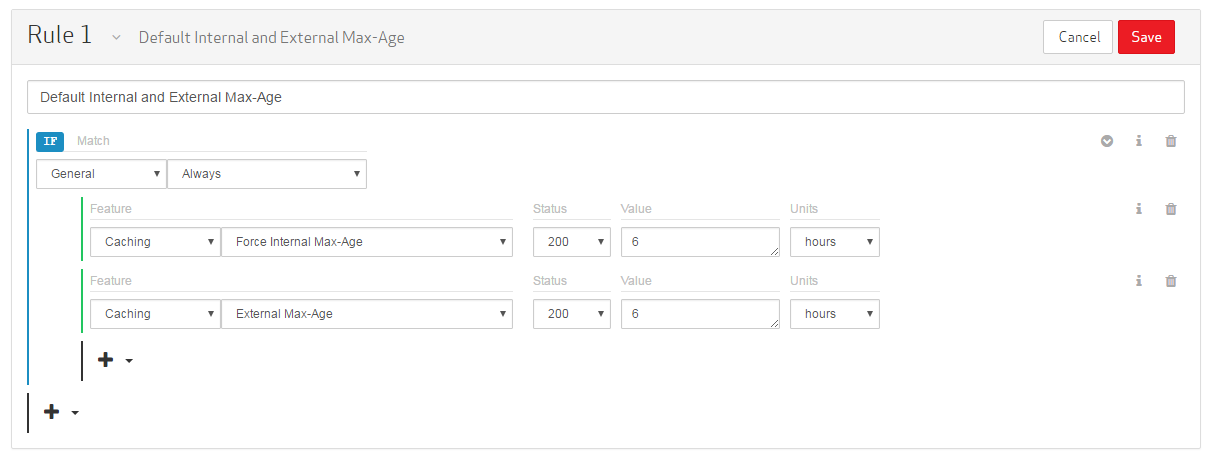
Click Save to add the rule to the draft.
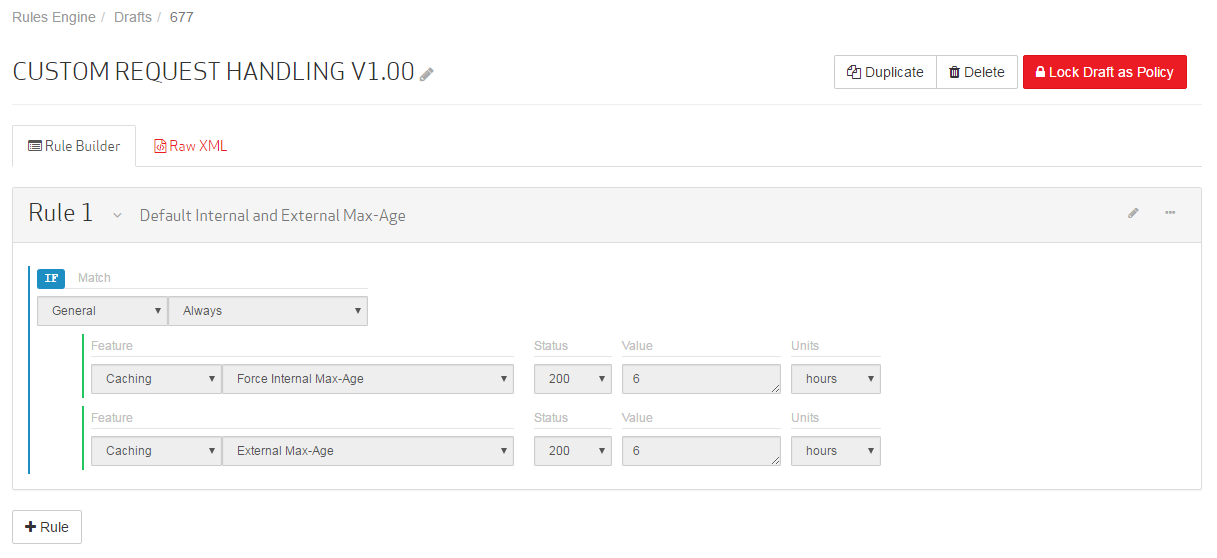
Step 5: Convert a Draft to a Policy
Before a draft may be applied to production traffic, it must first be converted into a read-only policy.
Click Lock Draft as Policy.
The final step required to apply a configuration to production traffic is to deploy the new policy to the Production environment.
Click Deploy Request.
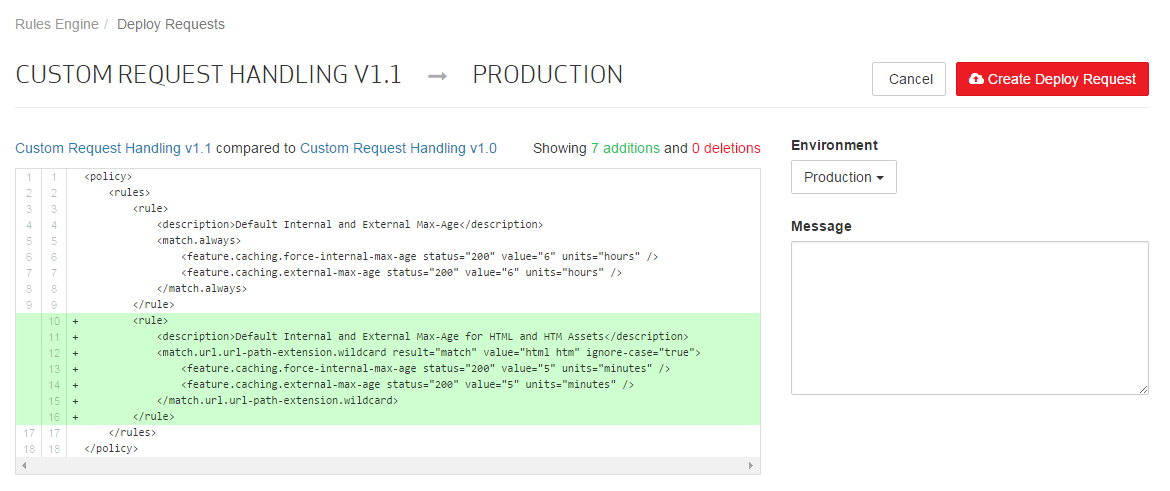
From the Environment option, select "Production."
Notice that XML data is now displayed on the left-hand side of the page. The purpose of this view is to display the differences between the policy currently deployed to an environment and the new policy. In this case, a policy has not been previously deployed to the Production environment. Therefore, the XML view will simply display the XML equivalent of the proposed policy.
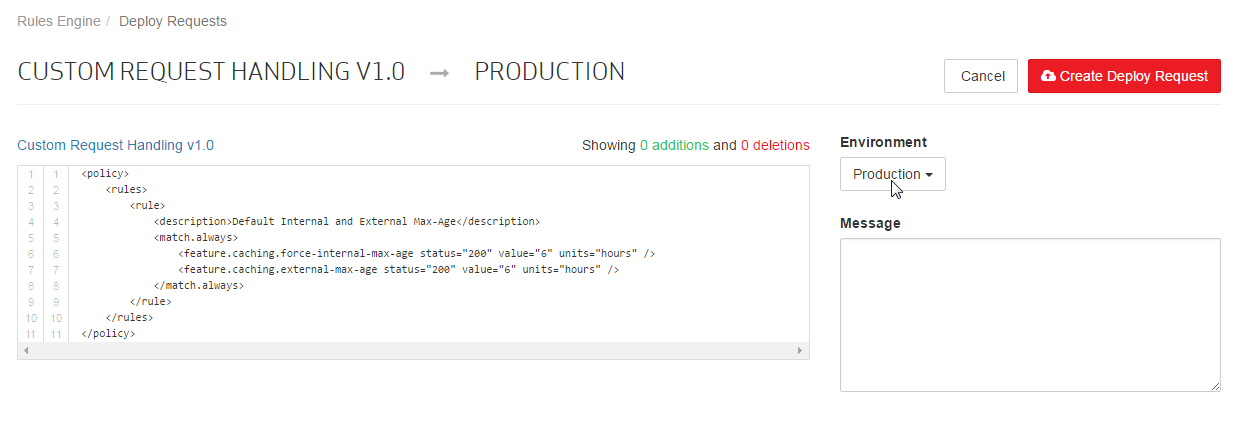
A note must be included with each deploy request. This note typically explains the reason for the requested change. This information is useful when viewing historical information on configuration deployments.
Set the Message option to "Initial caching policy."
Click Create Deploy Request.
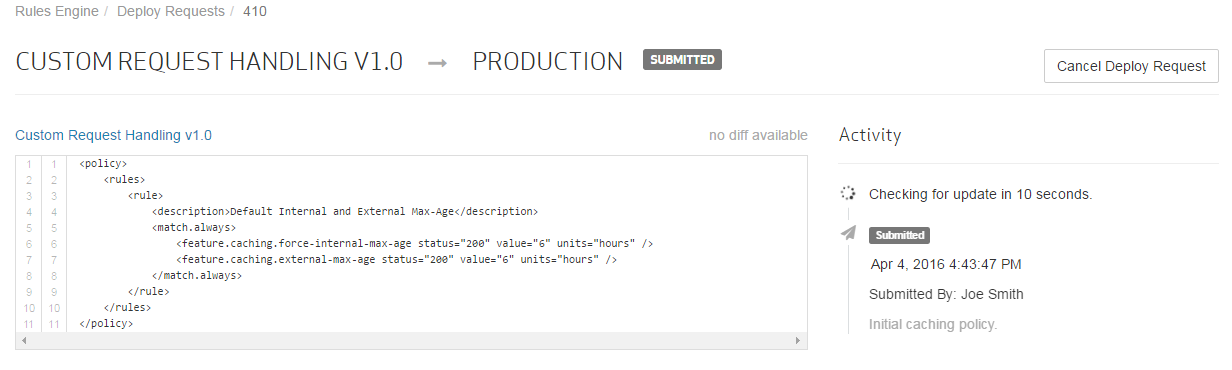
The policy will now undergo automated review and approval. Upon approval, it will be published to the Production environment. After which, the landing page will indicate the date and time at which it was published. It may take up to an additional hour for the policy to be fully applied to the Production environment. After which, requests for all content will be assigned a default max-age of 6 hours.
Creating an HTML/HTM-Specific Rule Tutorial
The default caching policy defined in the above rule may be suitable for most of your content. However, it may not be ideal for frequently updated content (e.g., HTML and HTM). In order to account for this scenario, another rule will need to be created. This new rule should define criteria that allows our edge servers to identify (i.e., match) requests for HTML and HTM assets and assign a different caching policy to them.
Step 1: Duplicate a Policy
The purpose of this tutorial is to show how to override the default caching instructions defined in the above walkthrough. Instead of manually recreating the catch-all rule, a draft based off of the policy deployed to the Production environment may be created.
From the Rules Engine landing page, click on the "Custom Request Handing v1.0" policy. A link to this policy is provided from the Production section and on the Policies tab.
Click Duplicate. A draft called "Custom Request Handling V - clone from Policy" will be created.
Rename the draft by clicking ![]() next to its name, typing "Custom Request Handling v1.1," and then clicking
next to its name, typing "Custom Request Handling v1.1," and then clicking ![]() .
.
Step 2: Create a Rule that Identifies Requests by File Extension
Create a rule that defines how requests for HTML and HTM assets are handled. Requests may be identified by file extension through the URL Path Extension Wildcard match condition.
Click + Rule.
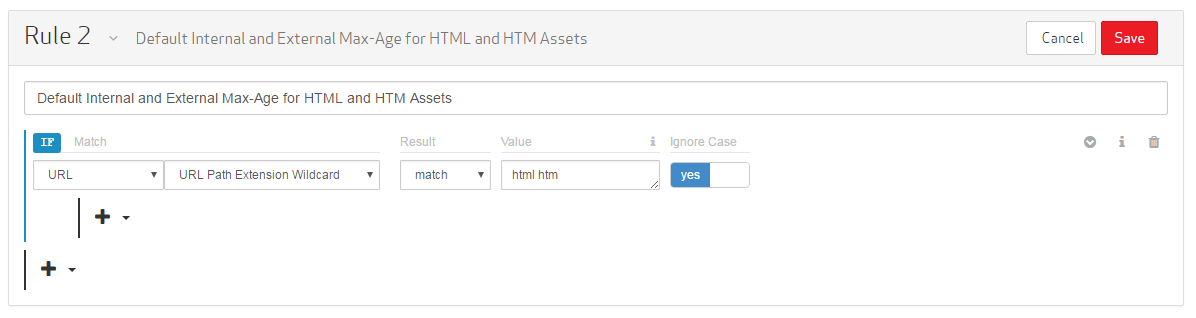
In the Name/Description option, type "Default Internal and External Max-Age for HTML and HTM Assets."
From the new rule, click ![]() and then select "Match."
and then select "Match."
Set the category to "URL."
Set the match condition to "URL Path Extension Wildcard."
Set the Result option to "match."
Set the Value option to "html htm."
Click on the Ignore Case option to set it to "yes."
Step 3: Define a Caching Policy
Define a caching policy that allows our edge servers to check for a new version of an HTML/HTM asset from the origin server if five minutes have passed since the asset was originally requested.
Directly below the match condition, click ![]() and then select "Feature." A new feature will be displayed directly below the match condition.
and then select "Feature." A new feature will be displayed directly below the match condition.
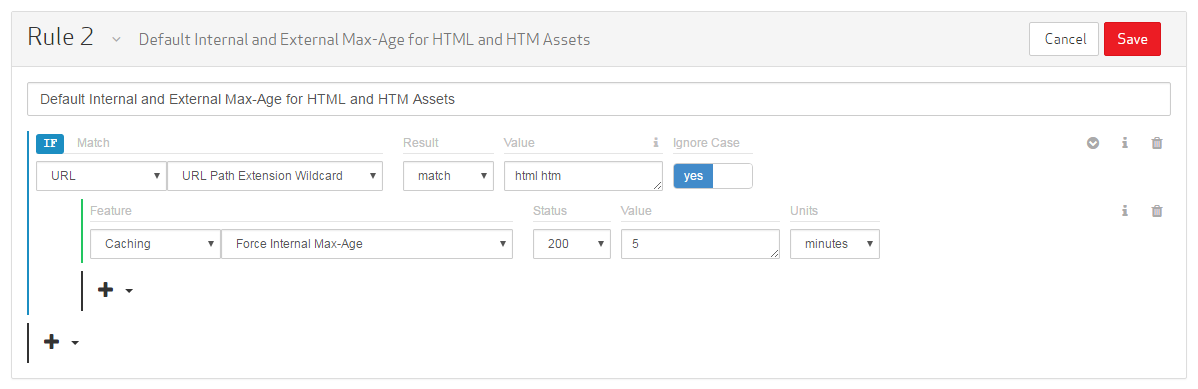
Set the category to "Caching."
Set the feature to Force Internal Max-Age.
Leave the Status option set to "200."
Set the Value option to "5." This value represents the amount of time that must pass before an edge server can check the origin server for new content.
Set the Units option to "minutes."
The next step is to add a feature that determines how much time must pass before a user agent (e.g., web browser) can check for a new version of an HTML or HTM asset from an edge server.
Directly below the match condition, click ![]() and then select "Feature." A blank feature configuration will be displayed directly below the Force Internal Max-Age feature configuration.
and then select "Feature." A blank feature configuration will be displayed directly below the Force Internal Max-Age feature configuration.
Set the category to "Caching."
Set the feature to External Max-Age.
Leave the Status option set to "200."
Set the Value option to "5." This value represents the amount of time that must pass before a user agent (e.g., web browser) can check for an updated version of the requested content from an edge server.
Set the Units option to "minutes."
Click Save to add the rule to the draft.
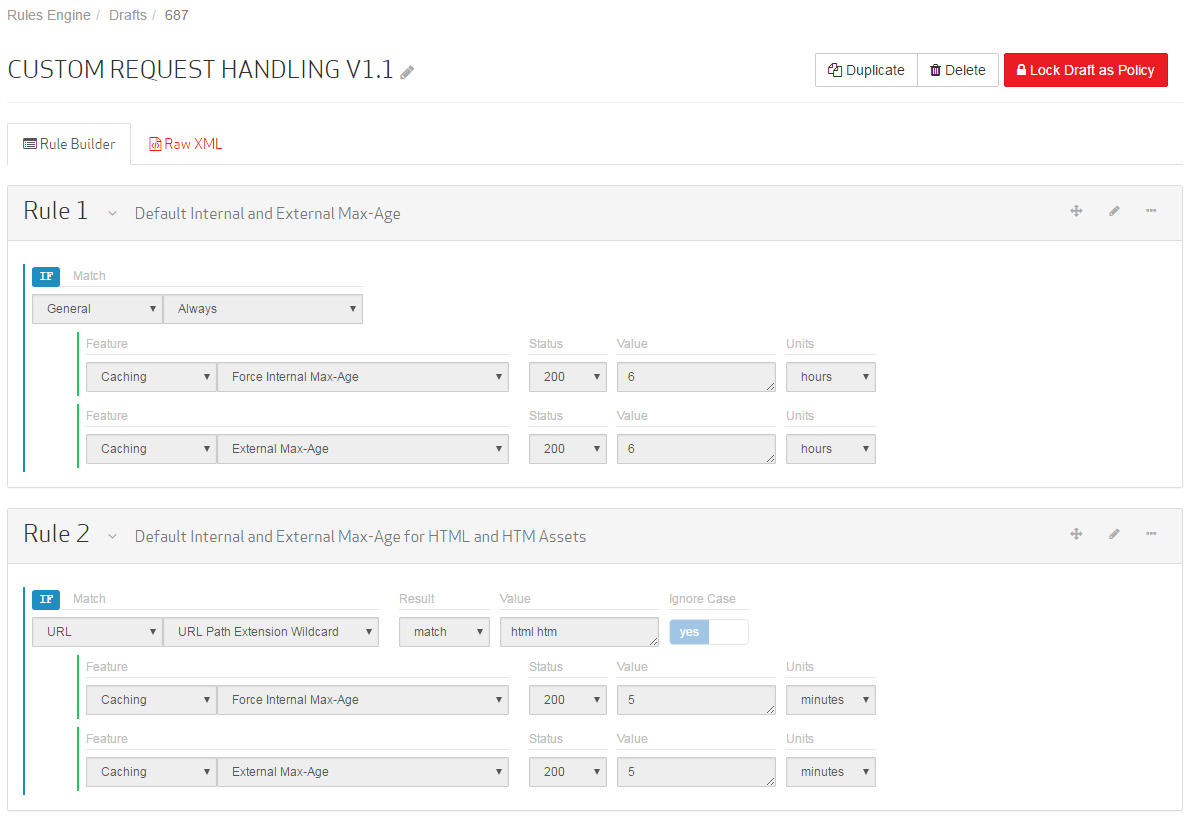
Notice that the new rule appears below the catch-all rule. This is important, since the order in which rules are listed typically determines which action should take precedence when multiple actions have to be applied to the requested content. Once this configuration is applied to production traffic, all assets that have not been assigned a max-age by the origin server will be assigned one by the catch-all rule. After which, requests for HTML and HTM assets will be assigned a shorter max-age.
Step 4: Convert a Draft to a Policy
Before a draft may be applied to production traffic, it must first be converted into a read-only policy.
Click Lock Draft as Policy.
Step 5: Deploy a Policy
The final step required to apply a configuration to production traffic is to deploy the new policy to the Production environment.
Click Deploy Request.
From the Environment option, select "Production."
This page will now indicate the XML differences between the proposed policy and the one currently in the Production environment. Specifically, it shows that 7 rows have been added. These rows represent the rule that defines a caching policy for HTML and HTM assets.
A note indicating why this change is being submitted must be included when submitting a deploy request.
Set the Message option to "Updated caching policy."
Click Create Deploy Request.
The policy will now undergo automated review, approval, and publishing. It may take up to an hour for this updated policy to take effect.
Denying Specific Types of Requests Tutorial
The order in which the above two rules are listed affects how they interact with each other. However, for the purposes of this walkthrough, rule order does not matter for the rule created in this section. ![]() Learn more.
Learn more.
This walkthrough creates a rule that denies all requests for content residing in the "private" directory that were not referred from a specific hostname (i.e., secure.example.com).
Step 1: Duplicate a Policy
This walkthrough demonstrates how to add a rule to an existing policy.
From the Rules Engine landing page, click on the "Custom Request Handing v1.1" policy. A link to this policy is provided from the Production section and on the Policies tab.
Click Duplicate. A draft called "Custom Request Handling V - clone from Policy" will be created.
Rename the draft by clicking ![]() next to its name, typing "Custom Request Handling v1.2," and then clicking
next to its name, typing "Custom Request Handling v1.2," and then clicking ![]() .
.
Step 2: Create a Rule that Identifies Requests to be Denied
The next step is to create a rule that identifies the type of requests that will be denied. This walkthrough denies requests that meet the following two requirements:
| Match Condition | Description |
|---|---|
|
This match condition defines the location that will be secured. In this example, this condition will be satisfied by requests that point to:
|
|
|
This match condition defines the referrer from which the request must originate. This condition will be satisfied by requests whose referring domain is not "secure.example.com" |
Click + Rule.
In the Name/Description option, type "Deny Access to Unauthorized Requests for Private Information."
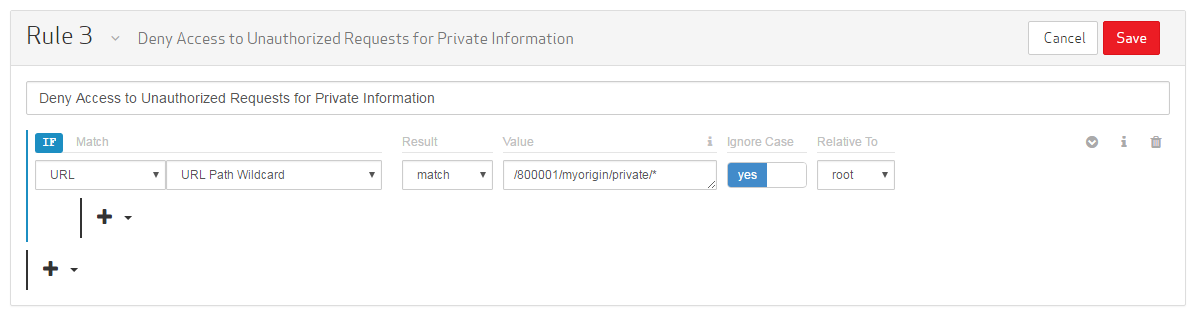
Set up the first requirement by defining a location that will be secured recursively.
From the new rule, click ![]() and then select "Match."
and then select "Match."
Set the category to "URL."
Set the match condition to "URL Path Wildcard."
Set the Result option to "match."
Set the Value option to the desired path (e.g., /800001/myorigin/private/*). This path should start directly after the CDN hostname (e.g., wpc.0001.{Base Domain}). In this example, we have appended a wildcard to perform a recursive matchAn asterisk (*) may be used to match all requests directed to that folder and all of its subfolders..
Click on the Ignore Case option to set it to "yes."
Set the Relative to option to "root."
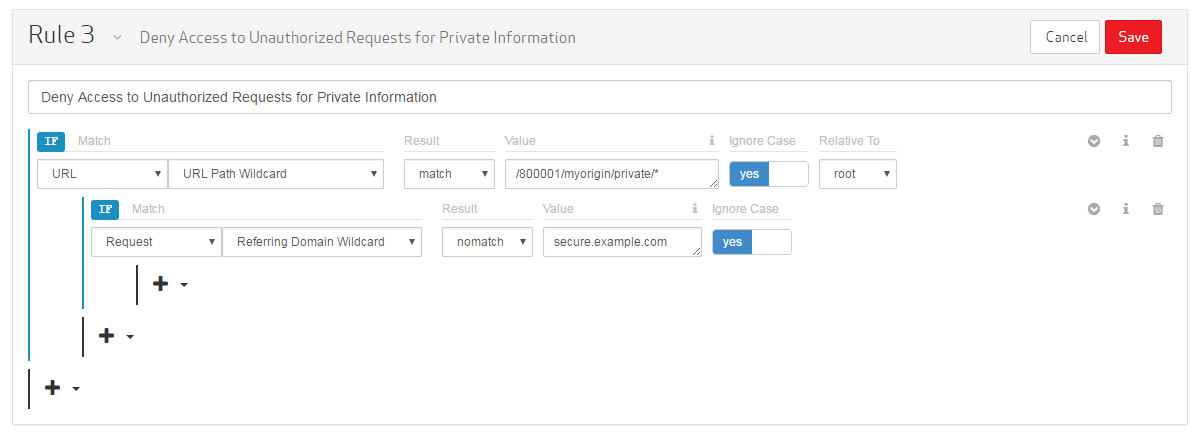
Set up the second requirement by defining a referring hostname for which requests will be allowed.
Directly below the URL Path Wildcard match condition, click ![]() and then select "Match." A nested match condition will appear. The parent of a nested match condition must be satisfied before the features associated with a child match condition may be applied to a request.
and then select "Match." A nested match condition will appear. The parent of a nested match condition must be satisfied before the features associated with a child match condition may be applied to a request.
Set the category to "Request."
Set the match condition to "Referring Domain Wildcard."
Set the Result option to "nomatch."
Set the Value option to "secure.example.com."
Click on the Ignore Case option to set it to "yes."
Step 4: Deny Requests
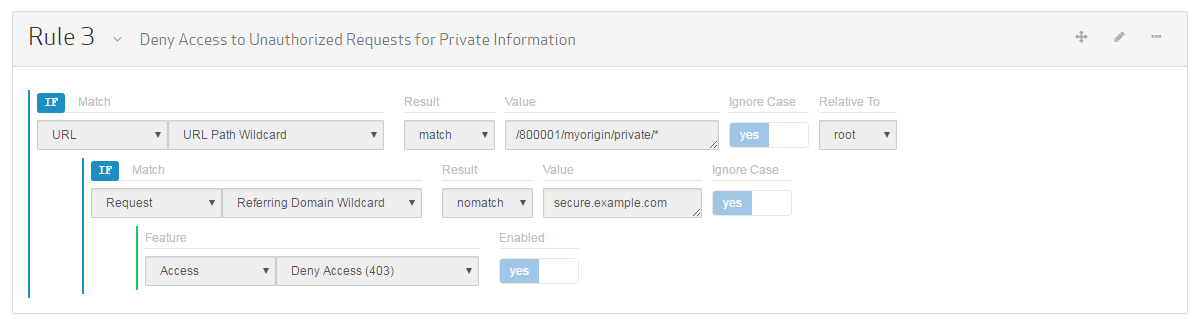
The next step is to deny all requests to the "private" folder when the referring domain is not "secure.example.com."
Directly below the Referring Domain Wildcard match condition, click ![]() and then select "Feature." A new feature will be displayed directly below that match condition.
and then select "Feature." A new feature will be displayed directly below that match condition.
Set the category to "Access."
Set the feature to Deny Access (403).
Click on the Enabled option to set it to "yes."
Click Save to add the rule to the draft.
Step 4: Convert a Draft to a Policy
Before a draft may be applied to production traffic, it must first be converted into a read-only policy.
Click Lock Draft as Policy.
Step 5: Deploy a Policy
The final step required to apply a configuration to production traffic is to deploy the new policy to the Production environment.
Click Deploy Request.
From the Environment option, select "Production."
This page will now indicate the XML differences between the proposed policy and the one currently in the Production environment. Specifically, it shows that 8 rows have been added. These rows represent the rule that secures the "private" directory.

A note indicating why this change is being submitted must be included when submitting a deploy request.
Set the Message option to "Added deny access rule."
Click Create Deploy Request.
The policy will now undergo automated review, approval, and publishing. It may take up to an additional hour for the policy to be fully applied.
Edgecast CDN