Our WAF offering is designed to secure site traffic against malicious and unwanted traffic. The core methods through which it secures site traffic are listed below.
- Leverages our distributed worldwide network to provide protection against large-scale distributed denial of service (DDoS) attacks.
- Screens traffic for the purpose of identifying application layer attacks.
- Filters traffic by defining access controls and predefined security screening rules.
- Restricts the rate at which requests may flow to your application.
Setup Overview
The configuration process for WAF is illustrated below.
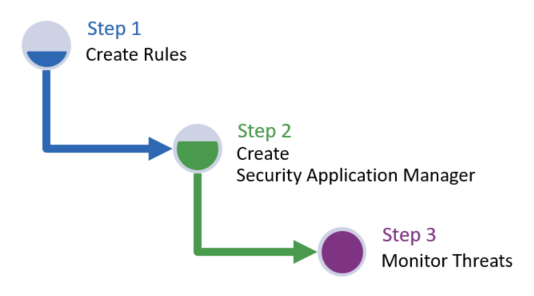
Step 1: Create Rules
Step-by-step instructions on how to create an access rule, rate rule, and managed rule are provided below.
Create a custom rule to identify threats using custom criteria that takes into account your site's traffic profile to avoid false positives.
Create an Access Rule
Create an access rule that identifies traffic that should be allowed, denied, or screened through whitelists, accesslists, and blacklists.
Navigate to the Access Rules page. ![]() How?
How?
Click Add Access Rule.
In the Name option, type My Access Rule.
From the Add an Access Control option, select IP.
Click Add Blacklist.
Specify an IP address from which suspicious traffic originates.
Click Save.
Create a Rate Rule
Use a rate rule to restrict the flow of traffic to your application.
Navigate to the Rate Rules page. ![]() How?
How?
Click Add Rate Rule.
In the Rule name option, type My Rate Limit.
In the Apply rate limit to option, select IP address.
In the Rate limit section, set the Number of requests option to 100 and the Time period option to 1 minute.
Click Save.
Create a Managed Rule
Create a managed rule that leverages predefined rules to detect application layer attacks.
Navigate to the Managed Rules page. ![]() How?
How?
Click Add Managed Rule.
In the Name option, type My Managed Rule.
Click the Policies tab. In the Ruleset option, select ECRS 2020-11-02.
Set the Threshold option to 5.
Set the Paranoia Level option to 1.
From the Policies section, disable policies that do not apply to your application. For example, you may safely disable Adv Drupal, Adv SharePoint, and Adv WordPress if your application does not leverage those platforms.
Click Save.
Step 2: Create Security Application Manager Configuration
Step-by-step instructions on how to create a Security Application Manager configuration that identifies the security policy that will be applied to your application are provided below.
Navigate to the Security Application Manager page. ![]() How?
How?
Click Add New.
In the Name option, type My Application.
From the Rules section, click Access Rule.
From the Production Access Rule option, select My Access Rule.
From the Action type option, select Alert only.
From the Rules section, click Managed Rule.
From the Production Managed Rule option, select My Rate Limit.
From the Action type option, select Alert only.
From the Rules section, click Rate Rules.
From the Add Rate Rule option, select My Managed Rule.
From the Action type option, select Drop request (429 Too Many Requests).
Click Save.
Step 3: Monitor Threats
The Threats dashboard illustrates threat detection trends and lists recent illegitimate requests. This dashboard is a useful tool for:
- Verifying that a newly activated instance/profile will not impact legitimate traffic.
- Analyzing threats directed to your site.
By default, the dashboard tracks the set of threats detected over the last week.
Data Gathering
After an instance has been activated, time needs to pass to allow WAF to gather sufficient data from which trends may be detected.
Wait a reasonable amount of time (e.g., 24 hours) after setting up a Security Application Manager configuration.
Navigate to the Threats Dashboard
View graphs and detailed alert data from the Threats dashboard.
Navigate to the Threats Dashboard page. ![]() How?
How?
Review Trends
The dashboard's graph provides insight into trends at a glance.
Review the graph at the top of the dashboard. Check for an abnormally high number of detected threats.
Analyze Individual Threats
It is useful to view detailed information on detected threats to ensure that WAF is correctly identifying threats.
Click the ![]() icon from the upper-right hand side of the window.
icon from the upper-right hand side of the window.
Click on each alert to view detailed information on it.
- Pay special attention to the requested URL. Verify that it is an illegitimate request.
-
If an alert was generated for a legitimate request, then review the Rule Tags, Matched On, and Matched Value fields to see why the request was flagged.
- Check whether the web application may be changed to prevent this type of request from occurring.
-
Our recommendation is that all of the following conditions be met before disabling a rule:
- Your application cannot be updated to reduce false positives.
- A rule exception cannot be created to eliminate false positives.
- A significant number of requests will be impacted by this rule,
You may safely disable a threat detection policy if it secures a platform (e.g., Drupal, SharePoint, and WordPress) that is not leveraged by your application.
If you must disable a rule, then note the values for the Rule Tags and Rule ID fields.
- The Rule Tags field identifies the threat detection policy.
-
Look for the rule ID defined in the Rule ID fields within your managed rule's policy. Disable that rule.
You may filter rules by ID when viewing a managed rule's policy.
More Information
- Tutorial: Securing Traffic via WAF Tutorial
- Frequently Asked Questions
- Monitoring Threats
- Monitoring Rate Limited Requests
- Monitoring Rate Limit Enforcement Instances
Edgecast CDN