Load Balancing Records (Primary Zone) Tutorial
This tutorial describes how to create a load balancing group from a set of address records associated with a zone. Before following the instructions in this tutorial, please make sure that you have created the following:
Create a load balancing group by performing the following steps:
- Modify a zone.
- Select address records.
- Define a hostname.
- Assign a DNS TTL.
- Assign a load balancing weight.
- Save the zone.
Step 1: Modify a Zone
Setting up load balancing for A records requires modifying a zone.
View a zone's configuration by clicking on it from the Route (DNS) page.
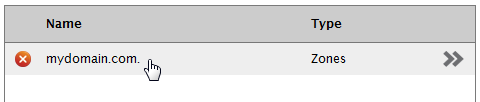
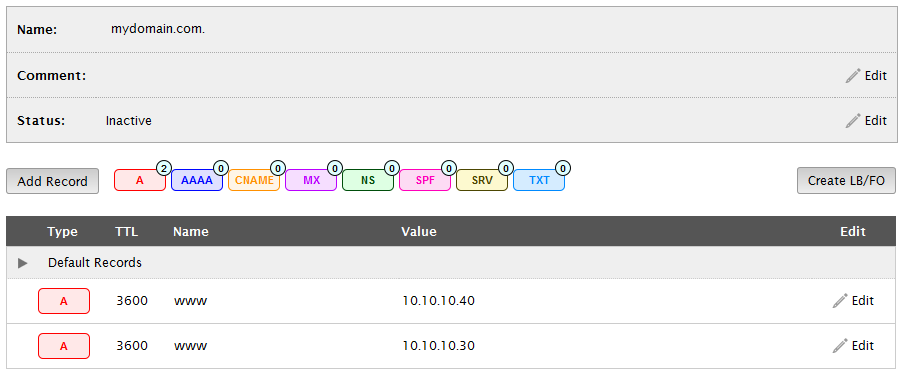
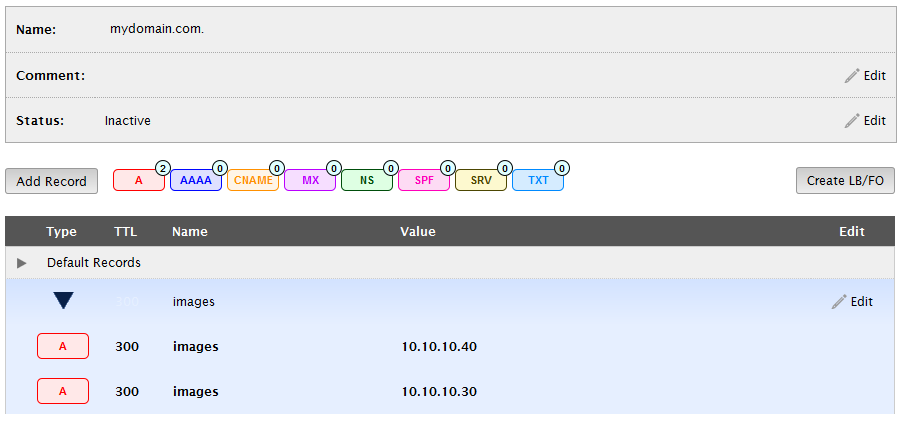
The page will be updated to display the configuration for the selected zone. The selected zone should display at least two user-defined address records as demonstrated in the following illustration.
Step 2: Select Address Records
A load balancing group may be created from the A records associated with a zone.
Click Create LB/FO.
Click Create Load Balancing.
A checkbox will appear next to each address record.
Mark the checkbox next to each desired address record.
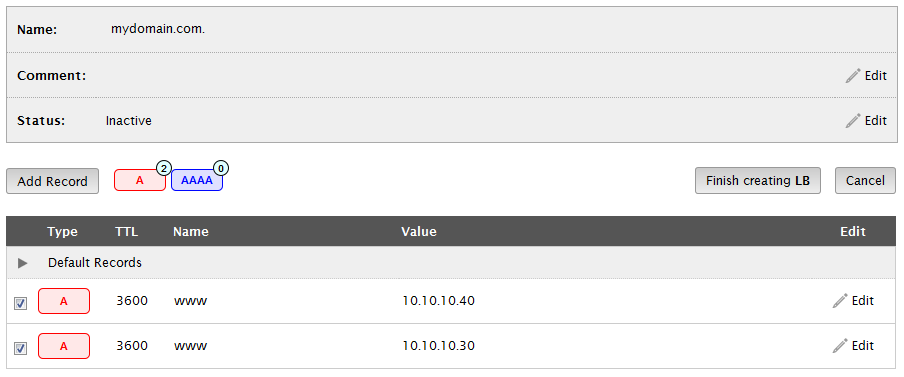
When finished, click Finish creating LB.
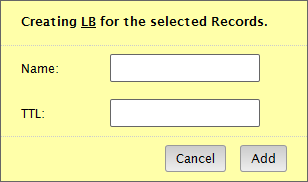
A dialog box will display the available options for your load balancing group.
Step 3: Define a Hostname
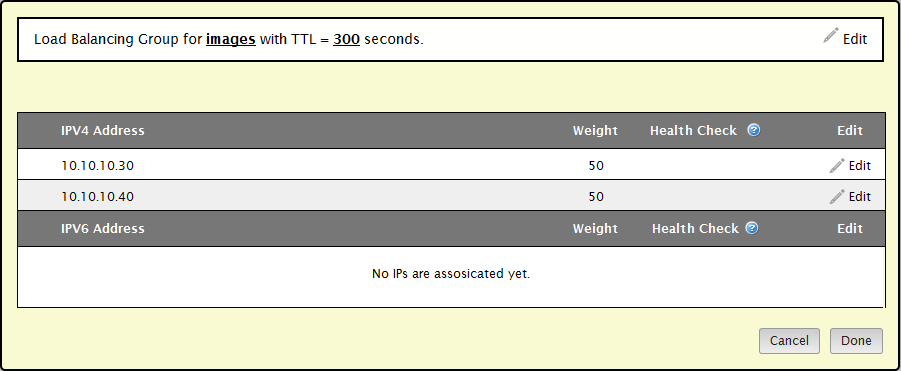
The name associated with your load balancing group defines a hostname. This hostname, in conjunction with the zone name, identifies a domain. For example, setting the Name option to "images" for a zone called "mydomain.com" identifies a domain called "images.mydomain.com."
Set the Name option to the desired value.

Step 4: Assign a DNS TTL
The TTL associated with a load balancing group determines how long, in seconds, a recursive name server can provide a cached response for DNS queries to the hostname in question. For example, setting a load balancing group's TTL to 300 seconds means that it may take up to five minutes before changes to your load balancing configuration are reflected by all recursive name servers.
Set the load balancing group's TTL to 300 seconds.

Click Add.
Additional load balancing settings, such as weight and health check configurations, will be displayed.
Step 5: Assign a Load Balancing Weight
Weight plays a key role in determining the proportion of requests that will be served to a specific IP address. In the above illustration, we see that both IP addresses have been assigned the same weight. This means that traffic will be split evenly between both IP addresses. In this walkthrough, we will configure the first IP address to receive three times as much traffic as the second IP address. This can be accomplished by changing the weight of the first IP address to triple the weight of the second IP address (i.e., 50 * 3 = 150).
Click Edit next to the first IP address.
Type "150" under the Weight column.
Click Done.

Click Done at the bottom of the dialog box.
A load balancing group will appear in the zone. The address records associated with that group are listed directly below it.
Step 6: Save the Zone
A load balancing group will not actually be created until you save the zone.
Use health checks to stop serving traffic to unhealthy servers.
View tutorial.
Click Submit Group.
Edgecast CDN