Creating a Primary Zone Tutorial
This tutorial provides step-by-step instructions on how to create a primary zoneA zone consists of the portion of the DNS namespace over which authority has been delegated. It contains information (i.e., records) through which an authoritative name server can provide an answer to DNS queries..
Create a zone by performing the following steps:
Step 1: Define Basic Zone Properties
Click Add New from the Route (DNS) page.
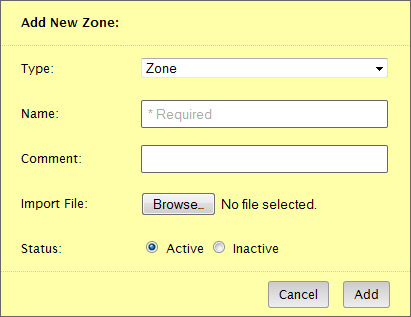
The Add New dialog box will expand to display zone settings upon selecting "Zone" from the Type option.

The most important setting when defining a new zone is its name. This name identifies a portion of the DNS namespaceRefers to the hierarchical tree structure through which domains are organized. for which our name servers will be authoritative. This means that our name servers can provide an authoritative answer for DNS queries to that namespace. In the following illustration, the zone name is "mydomain.com." Once this zone has been created, recursive name servers can forward a DNS query to our name servers for the domain called "mydomain.com."

Set the Name option to the desired zone name.
Click Add.
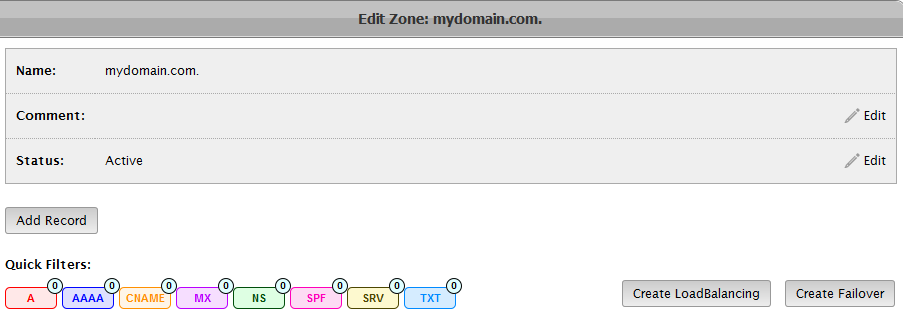
A page will display the properties and system-defined records that will be associated with your zone.

Step 2: Add Records
The next step is to add records to the zone. This allows traffic to resolve to your web servers. For example, address recordThis type of record maps a hostname to an IP address. A records are used for IPv4 addresses, while AAAA records are used for IPv6 addresses.s allow our name servers to resolve a hostname to an IP address.
Add one or more records.
View a tutorial on how to add an address record.
Step 3: Save the Zone
Create the zone by submitting your changes.
Click Submit Group.
Step 4: Switch DNS Service Providers
Once the zone is ready to start receiving traffic, point the name servers at your domain registrar to either our Route-branded or vanity name serverIdentifies a name server that leverages your zone name. This lends a professional appearance to a site's DNS.s.
Edgecast CDN