Streaming On-Demand Content Tutorial
Goal: Learn how to make content stored in the libraryThe library is a central repository for on-demand content. View the library's content via the Content tab in the CMS. available on-demand to your viewers.
This tutorial provides step-by-step instructions on how to test on-demand streaming without security. Once you have mastered this technique, please refer to our media player tutorials to learn how to create a media player and our security tutorials to learn how security may be integrated with content playback.
Software Prerequisites:
- Windows
Or
- macOS
Knowledge Prerequisites:
- Basic understanding of Windows
Or
- Basic understanding of macOS
Key Steps:
- Install the SlicerThe Slicer, which runs on Windows and macOS, slices, encodes, and then uploads media to the cloud. After which, this content is available for on-demand streaming. on a computer running Windows or macOS.
- Use the Slicer to add on-demand content to the library.
- Test the playback of the uploaded content.
Step 1 - Set Up an Account and Sign in
An account is required to stream content via our service.
Sign in to the CMS.
Step 2 - Install the Slicer
The Slicer is a Windows/macOS application that slices, encodes, and uploads media to the cloud.
Download the Slicer by clicking Downloads from the bottom right-hand corner of the CMS and then clicking either Mac Slicer or Windows Slicer.
Perform one of the following steps:
Windows: Extract the zip file to the desired directory.
Add a shortcut to the task bar or the Start menu by right-clicking on SlicerWPF.exe and then selecting either Pin to Taskbar or Pin to Start Menu.
macOS: Unzip the archive to the desired folder and then move the Slicer application to the Applications folder.
Unzip the Slicer package by either double-clicking it or running
unzipfrom the command line.
Step 3 - Add Content to the Library
Before on-demand content may be streamed to your viewers, it must first be added to the library via the Slicer.
Content added to the library is known as an asset.
Load the Slicer.
Windows: Load the Slicer by double-clicking SlicerWPF.exe
If a task bar or Start menu shortcut was created, then launch it using that shortcut instead.
- macOS: If the Slicer application cannot be opened as a result of a security configuration, try opening it while holding down the Control key.
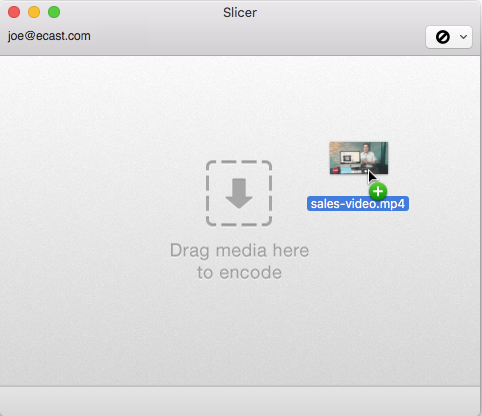
Drag and drop the desired media file on to the Slicer.
The Slicer accepts most common video formats (e.g., mp4, mpg, avi, mkv, mov, etc.).

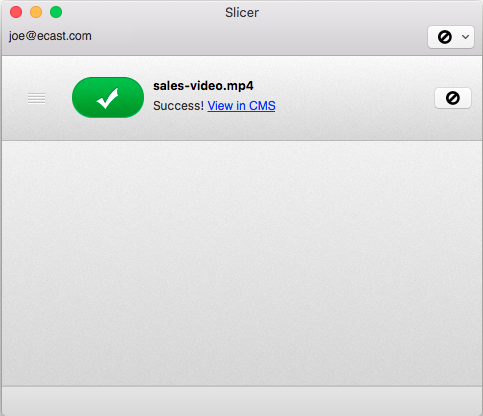
A progress bar will track as the Slicer slices, encodes, and then uploads media to the cloud. The Slicer will indicate when the entire asset has been uploaded to the library.

Step 4 - Test Playback
The CMS provides a media player through which playback may be tested.
A link to an unprotected media player that has been exposed to unauthorized individuals may be invalidated at any time.
From the Slicer, follow the View in CMS link that appears after the asset has been uploaded.
The CMS will be loaded in the default browser. If prompted, sign in to the CMS.
The library will be filtered to only display the asset that was just uploaded to it. Select that asset.

Click the Playback tab.
From the Test Players section, follow the View link corresponding to the desired test player.
The test player will stream the selected on-demand content in a new browser window or tab.
Please refer to our media player tutorials to learn how to create a media player and our security tutorials to learn how security may be integrated with content playback.


