Live Channels
A live channel represents a live linear stream that adheres to a timeline that identifies content and when it should be played.
Setup
Add audio/video content to a live channel via the following methods:
- Live Slicer: Verify that the slicer ID defined in the desired live channel is a case-sensitive match to the one defined in the Live Slicer configuration file (/etc/uplynk.conf). This allows the Live Slicer's output to be automatically added to the live channel's timeline.
- API: Add pre-encoded content and/or live content from multiple Live Slicers to a live channel via our Channel API.
Key information:
- Stream a feed by pointing a media player to the live channel's playback URL. Additionally, quickly embed a media player within a web page by leveraging a live channel's HTML code.
- Test playback by leveraging a restriction-free media player associated with a live channel.
- Secure a live linear feed by setting up whitelisted domains, a digital signature, and/or blackout within your live channel configuration.
- Slate is played in a loop when a live channel's timeline is missing content or during blackouts. Define the type of slate that will be played within a live channel's configuration.
- By default, a live channel trails the live horizon by ~60 seconds. See Playback Latency for reduced-latency options.
-
Set up Live Slicer failover to ensure uninterrupted playback of your live stream.
Click Save to apply your changes to your live channel's configuration.
To create a live channel
- Navigate to the Live Channels page.
 How?
How? - Click + Channel.
- In the Channel Name option, type the name by which this live channel will be identified.
- In the Slicer ID (Optional) option, type the unique alphanumeric ID by which the Live Slicer will identify this live channel.
- Optional. Set channel options:
• Check the Enabling Scheduling option to use the advanced scheduling interface and the latest channel APIs.
• Tick the Edit after creation box to open the record after submitting. - Click Create.
To change the default playback latency
From the Details tab of the Live Channels record, select the Playback Latency option from the dropdown:
-
Default: ~60 seconds
-
Low: Low 20s, 5+ second buffering, Missing Content Slate (MCS) is possible
-
Lower: Upper teens, 2+ seconds buffering, MCS is possible
-
Lowest: As low as 15 seconds, minimal buffering, no MCS
Use two-second slices. Slates must be encoded to 2 seconds.
Playback latency options cannot currently be used with Time Shifting.
Contact Support if you do not see the Playback Latency feature.
To delete a live channel
- Navigate to the Live Channels page. How?
- Tick the box on the live channel's tile; then click Delete Channel at the bottom of the pane.
- When prompted to confirm, click Delete.
To assign a failover group to a live channel
A prerequisite for this procedure is a failover group.
Learn more.
- Navigate to the Slicers page. How?
-
If you are trying to reassign a live channel to a different failover group, then perform the following steps to remove the live channel from its current failover group:
- Click on the desired failover group.
- From the Channels using Group section, mark the desired live channel.
- Click Remove.
- Click Save.
- Click on the failover group that will be assigned to the live channel.
- Click Add Channel Mapping.
- From the Channels option, select the desired live channel and then click
 .
. - Click Update Channel Mapping(s). The selected live channel will now be listed within the Channels using Group section.
- Click Save.
Ad Breaks and Content Replacement
Insert ad breaks or replace content within your live feed via the following methods:
- Schedule: Add an entry (i.e., an assetRefers to media (i.e., audio/video content) associated with either your account or a library shared with your account., ad break, or Live Slicer) to the live channel's schedule to schedule content replacement or an ad break.
-
Manual Override: Manually override a live channel's source to another Live Slicer.
-
Live Slicer Commands: Manually issue the following commands to the Live Slicer:
- Ad Break Command: Use either the Live Slicer API's replace_pod or pod_start endpoint to add dynamic ads to your live stream.
- Content Replacement Command: Use our Live Slicer API's replace_content endpoint to replace live content with an asset.
Upon encountering an ad break command or a content replacement command, the Live Slicer will enter a blackout state and stop capturing the live signal for a specified amount of time. This will cause a gap in the live stream. This gap may be automatically filled at playout with an assetRefers to media (i.e., audio/video content) associated with either your account or a library shared with your account. or dynamic ads.
Scheduling Ad Breaks and Assets
Overview
Certain features are incompatible with live channels that support schedule entries.
Learn more.
You must determine whether a live channel may leverage schedule entries upon its creation. Additionally, you cannot enable or disable the scheduling feature on existing live channels.
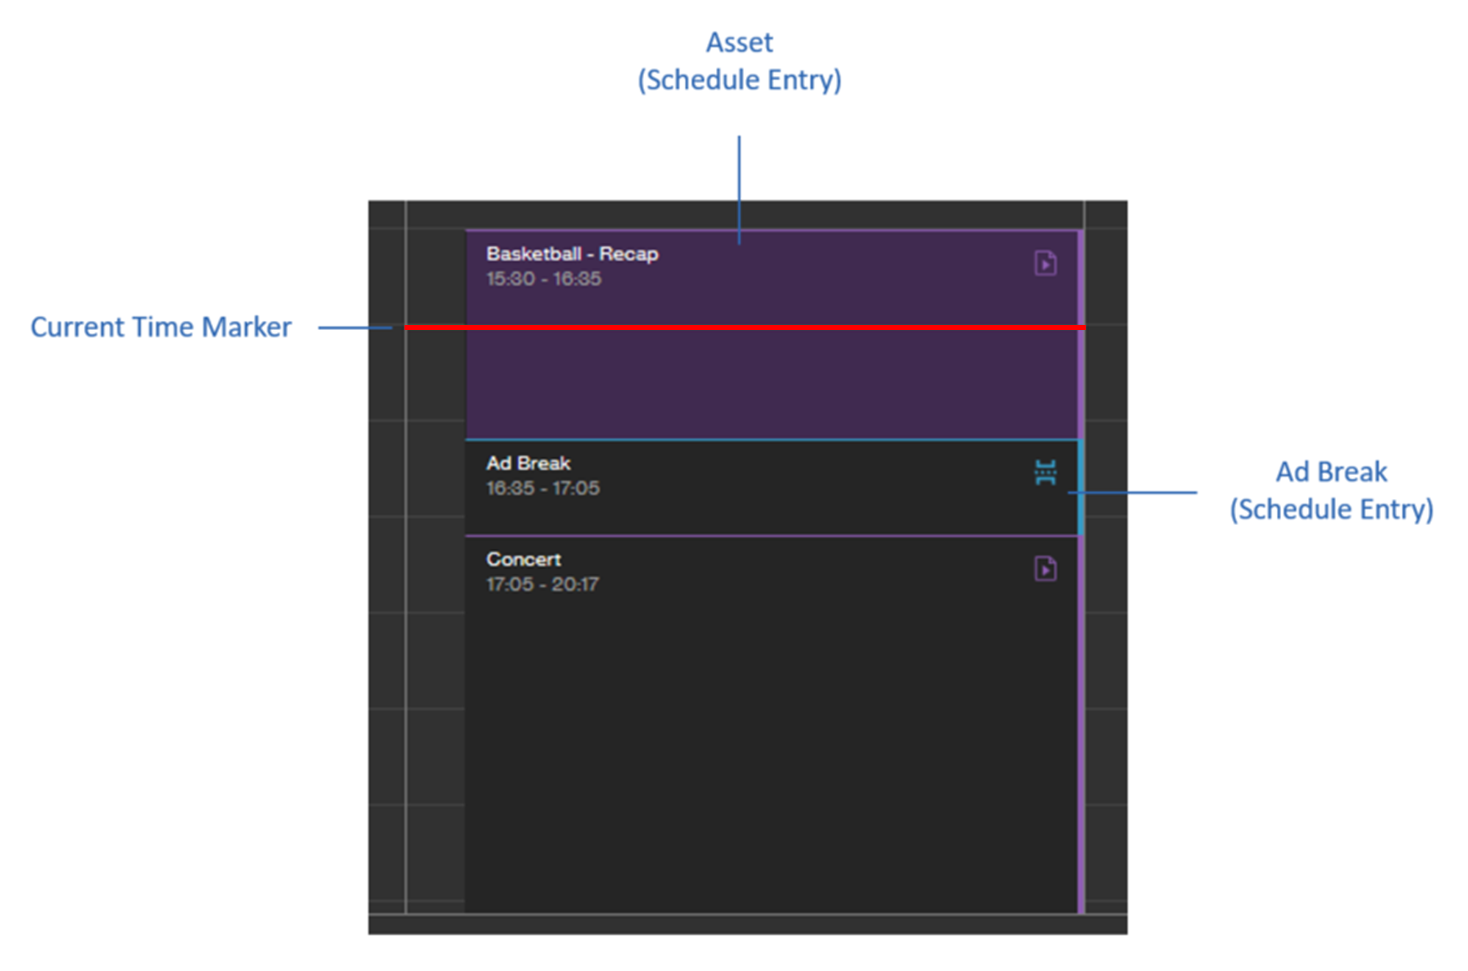
Schedule ad breaks, assetsRefers to media (i.e., audio/video content) associated with either your account or a library shared with your account., and Live Slicers within your live channel's timeline by adding individual entries or a playlistA virtual linear playlist consists of a sequence of assets and ad breaks. Adding a playlist schedules those assets and ad breaks in sequential order. to your schedule. A schedule entry identifies a point-in-time within the live linear feed that will be replaced with an ad break, an asset, or the feed from a specific Live Slicer during playout. The following illustration shows a schedule that contains asset and ad break entries.
Enabling Scheduling
Enable scheduling on a live channel during its creation by marking the Enable Scheduling option. You will see a calendar icon in the top right corner of the live channel's tile when scheduling is enabled.
You cannot enable or disable the scheduling feature on existing live channels.
Schedule Entry
Components
Each schedule entry consists of the following elements:
- Type: A schedule entry replaces the live feed with either an ad break, an asset, or the live feed from a different Live Slicer.
-
Start Time: A schedule entry's start time identifies the date and time at which either an ad break or an asset will start.
Prior to scheduling ad breaks and content replacement, you should adjust the time zone to reflect your programming's time zone. Upon selecting a different time zone, the time slot for your existing entries will shift to reflect your selection.
-
Duration: A schedule entry's duration is fixed for assets and manually defined for ad breaks and Live Slicers.
-
Ad Break and Live Slicer: Manually specify the duration for an ad break or Live Slicer schedule entry.
-
Asset: The schedule entry's duration is determined by the duration of its asset and all of the ad breaks that have been associated with that asset.
A schedule entry's duration cannot exceed 12 hours.
-
-
Content: A schedule entry's content varies by type.
- Ad Break: During playback, an upcoming ad break will trigger your player to issue a request for ads. An ad decision server may then serve dynamic ads which are automatically inserted into the scheduled ad break.
-
Asset: This type of schedule entry consists of an assetRefers to media (i.e., audio/video content) associated with either your account or a library shared with your account. and the ad breaks that have been inserted into it. Dynamic ads may be inserted into those ad breaks during playback as described above.
View an asset's ad breaks from the Ad Breaks tab. The Offset column indicates when each ad break will start relative to the start of the asset. For example, an offset of 00:10:30 indicates that the ad break will start 10 minutes and 30 seconds into the asset.
Insert ad breaks into an asset while encoding it. For example, use the break parameter to insert one or more ad breaks when encoding content via the Slicer.
-
Slicer: This type of schedule entry consists of the live feed from a specific Live Slicer.
You may only schedule another user's Live Slicer if it is streaming to a library shared with your account.
Add a playlist to insert the assets and ad breaks associated with it to your live channel's schedule. These assets and ad breaks are inserted in sequential order starting from the selected start time.
Once you have added a playlist to your schedule, you may modify or delete each schedule entry as needed. Modifying or deleting a schedule entry will not affect any other schedule entry or the original playlist. Additionally, modifying or deleting the original playlist will not affect your live channel's schedule.
Information describing a schedule entry is available for 30 days after it ends.
To add an entry to your live channel's schedule
- Navigate to the Schedule tab for the desired live channel. How?
-
Live channels created without scheduling enabled have a History tab and no scheduling functionality.
-
Optional. Adjust the time zone as needed.
Learn more.
Select a time zone that corresponds to your core audience.
Your viewer's time zone determines the programming that will play out. For example, if you schedule an entry for 10:00:00 PDT, then it will play out in New York at 13:00:00 EDT and in Paris at 19:00:00 CEST.
Adjust the current time zone by clicking on the current time zone, selecting the desired time zone, and then clicking Save.
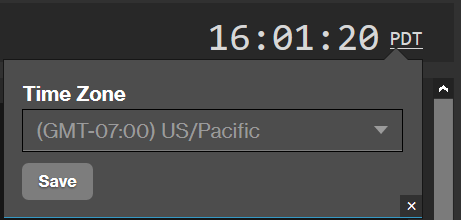
Upon selecting a different time zone, the time slot for your existing entries will shift to reflect your selection.
-
Navigate to the desired date and then click on the time slot to which the entry will be scheduled.
Select a more precise time slot by zooming in. Zoom in by sliding the Zoom option to the right.
You may set a start time that is precise to the second via the Start Time option. Please see the next step for more information.
-
Schedule an asset, ad break, Live Slicer, or playlist by performing one of the following procedures:
To replace the live feed with an asset
- Click Asset.
- Optional. Select the library corresponding to the desired asset from within the Library option.
- Optional. Search for the desired asset by typing a keyword directly to the right of the Library option and then clicking
 .
. - Select the desired asset.
- Optional. In the Start Time option, adjust the asset's start date and time.
-
Optional. If the asset contains ad breaks, then determine the duration of each ad break by performing the following steps:
- Click the Ad Breaks tab.
-
Set the duration for each ad break by performing one of the following steps:
-
Set the Total Duration Type option to Locked, type the desired duration for all ad breaks, and then click Set All Durations. Adjust the duration for each ad break as needed.
Upon updating an ad break's duration, the entry's total duration will be automatically calculated by summing the duration of the asset and all of its ad breaks.
-
Set the Total Duration Type option to Unlocked. From the Total Duration option, define the amount of time that will be set aside for the asset including all of its ad breaks.
Upon updating the asset's total duration, time in excess of the asset's duration is distributed evenly among all of its ad breaks. For example, let's assume that your asset's duration is 21 minutes, the Total Duration option is set to 30 minutes, and the asset contains 3 ad breaks. In this situation, 9 minutes will be evenly distributed between 3 ad breaks. This means that the duration for each ad break will be 3 minutes.
-
-
Perform either of the following steps:
- Save your changes by clicking Add Asset.
- Save your changes and add another asset by clicking Add and Select Another Asset.
To insert an ad break
- Click Ad Break.
- In the Name option, assign a name to the ad break.
- Optional. In the Start Time option, adjust the ad break's start time.
- In the Total Duration option, type the duration of the ad break.
- Click Add Ad Break.
To replace the live feed with a live feed from another Live Slicer
- Click Slicer.
-
In the Slicer ID option, identify a Live Slicer by the ID defined within the SlicerID setting of its Live Slicer configuration file.
Shared Live Slicer
You may schedule another user's Live Slicer if it is streaming to a library shared with your account. However, you must also identify the user that owns the Live Slicer through the following syntax:
User ID:Live Slicer ID - Optional. In the Start Time option, adjust the asset's start date and time.
- In the Total Duration option, type the duration of the Live Slicer's live feed that will be scheduled within your live channel.
-
Perform either of the following steps:
- Save your changes by clicking Add Slicer.
- Save your changes and add another Live Slicer by clicking Add and Select Another Slicer.
To insert a playlist's assets and ad breaks
- Click Playlist.
- In the Playlists option, select the desired playlist.
- Optional. In the Start Time option, adjust the start time at which all of the playlist's assets and ad breaks will be inserted in sequential order.
-
Perform either of the following steps:
- Save your changes by clicking Add Playlist.
-
Save your changes and add another playlist by clicking Add and Select Another Playlist. Use this option to add another playlist's assets and ad breaks immediately after the last schedule entry generated from the playlist selected in step 2.
Adding a playlist generates schedule entries that are completely independent from each other. This means that you may modify or delete any schedule entry, regardless of whether it was inserted as a result of a playlist, without affecting any other schedule entry.
-
If our service detects a conflict with one or more previously scheduled entries, then you will be required to resolve it before being allowed to proceed. Resolve a conflict by performing one or more of the following steps:
- Adjust the entry's start time from within the Start Time option.
- If you are adding an ad break, adjust the entry's duration from within the Total Duration option.
-
From the Conflicts tab, you may instruct our service to remove conflicting entries or to trim the entry being added.
- If you would like to remove previously scheduled entries that conflict with the entry being added, then you should select the Remove conflicts option.
-
If you would like to trim the beginning of the asset to fit within the current scheduling gap, then you should select the Autofit new entry by trimming it from the beginning option.
For example, selecting this option when scheduling a 20 minute asset within a 15 minute scheduling gap would trim the first 5 minutes of that asset. This means that playback of this entry will start 5 minutes into the asset.
-
If you would like to trim from the end of the asset to fit within the current scheduling gap, then you should select the Autofit new entry by trimming it from the end option.
For example, selecting this option when scheduling a 20 minute asset within a 15 minute scheduling gap would trim the last 5 minutes of that asset. This means that viewers will only be allowed to play the first 15 minutes of this entry.
Trimming an asset can affect the number of ads served. Specifically, we will not serve ads for an ad break positioned within a portion of the asset that is trimmed.
- Click Cancel if you no longer wish to add this entry to your live channel's schedule.
- Click Add Asset, Add Ad Break, Add Slicer, or Add Playlist to apply the above change(s).
To modify a schedule entry
- Navigate to the Schedule tab for the desired live channel. How?
-
Click on the desired entry and then click Edit Asset, Edit Ad Break, or Edit Slicer.
If the entry has a short duration, hover over it to expand it. If it is still too small, zoom in to the schedule by sliding the Zoom option to the right.
-
Perform one of the following steps:
- Asset: Modify the asset's start time and ad break durations as needed.
- Ad Break: Modify the ad break's name, start time, or duration as needed.
- Live Slicer: Modify the Live Slicer's ID, start time, or duration as needed.
- Click Update Asset, Update Ad Break, or Update Slicer to save your changes.
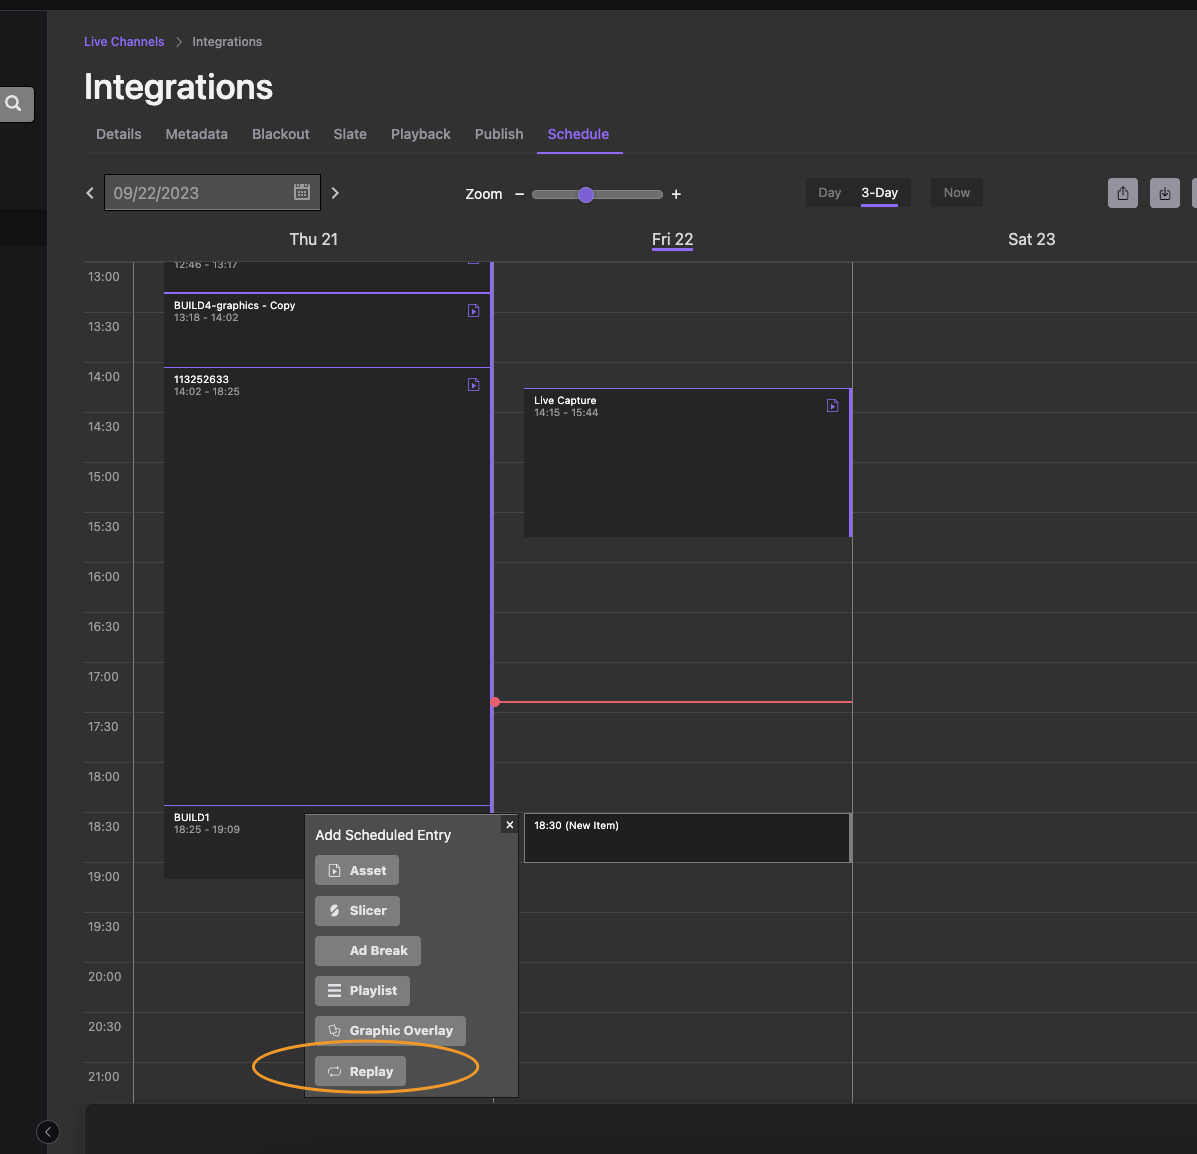
To replay schedule entries
Use this feature to replay a live session during a specified time slot.
- Navigate to the Schedule tab for the desired live channel. How?
-
Click on an empty time slot in the future and choose Replay from the list of options. This will launch the Replay window.

-
Fill out the Details tab for the replay:
- Name: This title will appear in the schedule.
- Start Time: The time the replay should begin playing.
- Duration: The length of time of this replay.
- Source - Start Time: The start time of the content you want to be replayed.
- Source - End Time: The end time of the content you want to be replayed.
-
Click Add Replay at the bottom left to save this entry and add it to the schedule.
To reorder schedule entries
- Navigate to the Schedule tab for the desired live channel. How?
-
Click on the entry to drag and drop to the new time slot or hold down the Shift key, click, and drag the entry over another entry to magnetize them together.
-
The update is confirmed with a pop-up in the top right corner.
To delete a schedule entry
- Navigate to the Schedule tab for the desired live channel. How?
-
Click on the desired entry and then click Edit Asset, Edit Ad Break, or Edit Slicer.
If the entry has a short duration, hover over it to expand it. If it is still too small, zoom in to the schedule by sliding the Zoom option to the right.
- Click Delete.
- When prompted, confirm the deletion by typing DELETE and then clicking Delete.
This feature allows you to select fields from scheduled content to export to a .csv file so you can quickly re-use the same schedule or share with other stakeholders.
- Navigate to the Schedule tab for the desired live channel. How?
-
Select the export option from the top right corner.

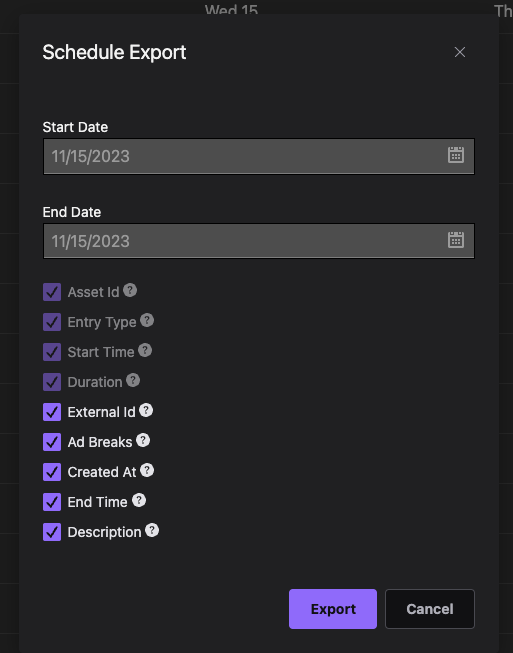
- From the Schedule Export window, select the start and end dates of the schedule to export.

-
Check the box for the fields to export. Certain fields are selected by default, and you can include other fields to customize the data exported.
- Asset Id - The ID of the asset/ad/slicer.
- Entry Type - The type of the entry (asset/ad/slicer).
- Start Time - The time the entry starts based on where the it is in the schedule.
- Duration - The total duration of the asset (including ads).
- External Id - The external ID of an asset, if there is one.
- Ad Breaks - The duration of each break measured in seconds.
- Created At - The time stamp (in ISO) when the entry was added.
- End Time - The time stamp (in ISO) when the entry ends.
- Description - A description of the asset, if there is one.
- Click Export to save the .csv file to your system's default location.
To import a schedule
Use this feature to import a .csv file of an existing schedule to quickly add content to your channel.
Importing a .csv file will override any content currently scheduled in the channel.
Pre-requisite: Export the schedule you want to upload to your channel.
-
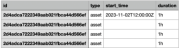
Open the .csv file you exported and update the fields for the new schedule.
- id - The ID of the content that should reflect an asset, an ad, or a slicer.
- type - The classification of the content. The available options are "asset", "ad", or "slicer".
- start_time - The time you want the asset to start playing.
- duration - The length of time the content plays, including its ad breaks (e.g., If the asset is 30 minutes long and has two ad breaks, and you set the duration to one hour, each duration will be 15 minutes long).
If you want the first asset to start at a specific time, and then the following asset to start at the end time of the previous asset, the start_time field should remain empty for the subsequent asset. For example:
- Save your changes to the .csv file.
- Navigate to the Schedule tab for the desired live channel. How?
-
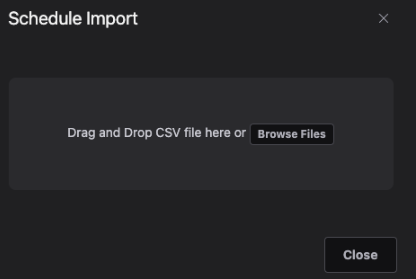
Select the import option from the top right corner.

- Drag your .csv file into the window or click Browse Files to find and open the file to upload.

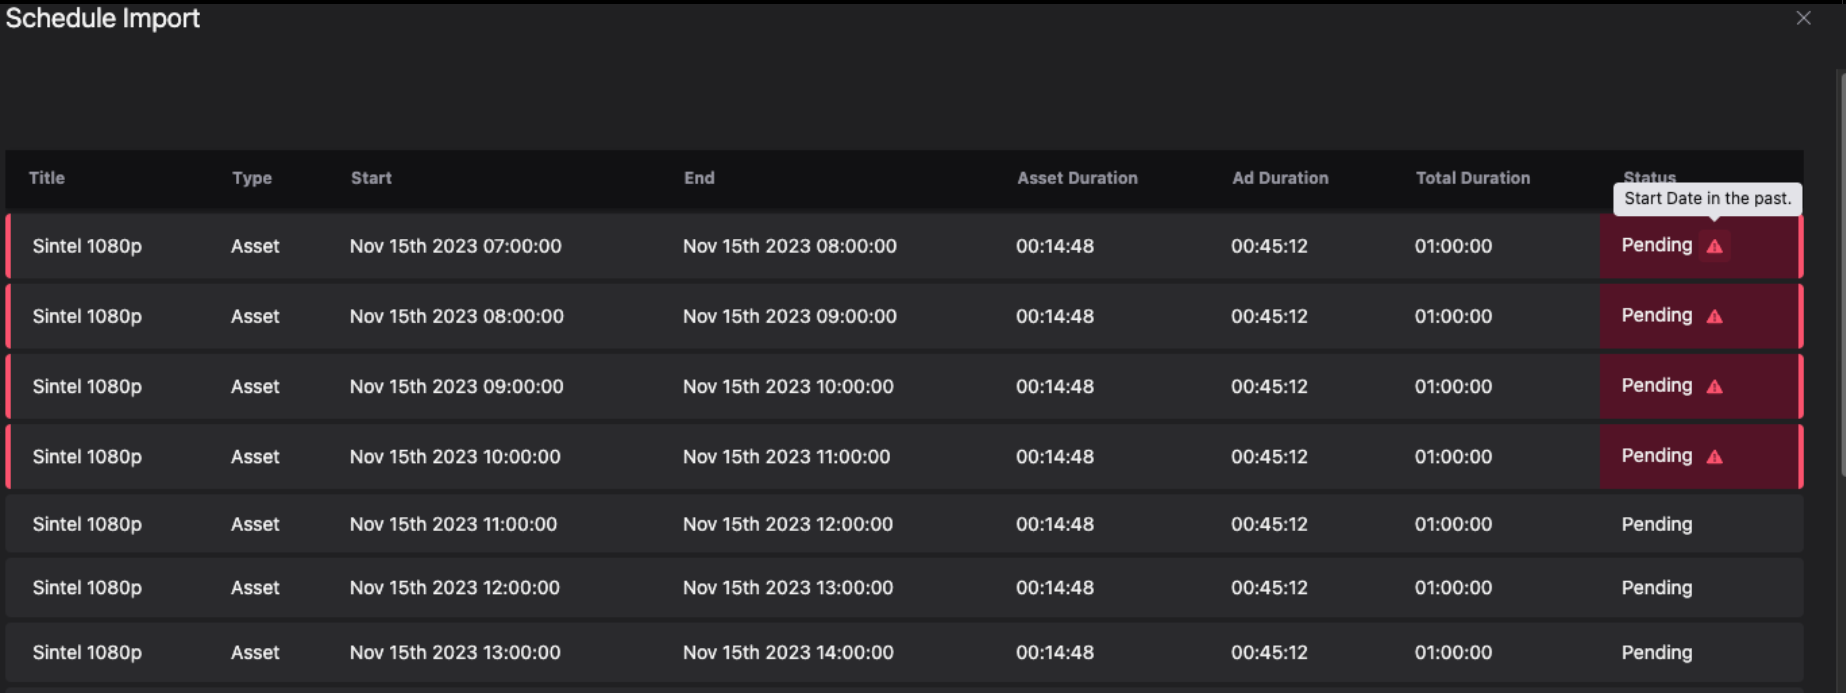
-
Optional. Fix any errors indicated in the Status column.

- Hover over the error indicator to see the error description.
- Close the Schedule Import window.
- Correct the errors in the .csv file and save the changes.
- Import the file again. (Step 4 in this section.)
-
Select Import; then click Import again to acknowledge the overwrite notice.
- Optional. Pause or cancel import.
Pause/Resume - Once the import has started, you can suspend or continue the upload by toggling the Pause/Resume button at the bottom right of the list.
Cancel - Click Cancel to stop the import with no impact to your existing channel content. - Close the Schedule Import window when the import is complete. Upon completion, the Status of all assets is marked as successful, and the channel's schedule is updated with the imported entries.

Time
Time must be specified when setting the duration for an asset, ad break, or Live Slicer.
Use h, m, and s as shorthand for hours, minutes, and seconds, respectively. For example, 5m represents 5 minutes, while 4m 30s represents 4 minutes and 30 seconds.
Syntax:
Example:
Use the following value to define a duration of 5 minutes and 30 seconds:
Restrictions
The following capabilities are unsupported for live channels that can leverage schedule entries:
- Blackout or reverse blackout
Source Override
You may manually override a live channel's source to another Live Slicer. At any point, you may return the live channel to the schedule. This allows your viewers to join in progress (JIP) the regularly scheduled programming.
This capability requires a live channel that supports schedule entries.
Manually overriding a live channel's source allows you to quickly switch to different content (e.g., breaking news).
Overriding a live channel's source will not modify your schedule or your live channel's default Live Slicer.
To manually override a live channel's source
- Load the desired live channel.
- From the right-hand pane, set the Override Content option to the case-sensitive ID of the Live Slicer that will serve as the live channel's new source.
- Click Yes, Override to confirm that you would like to override the live channel's source.
To stop overriding a live channel's source
- Load the desired live channel.
- From the right-hand pane, click Return to Schedule.
- Click Yes, Return to confirm that you would like to return regularly scheduled programming.
REST APIs
Leverage our REST APIs to automate Live Slicer behavior and to manage schedule entries.
-
Live Slicer API: The Live Slicer exposes an HTTP-based API for marking ad breaks, blackouts, and content boundaries. A Live Slicer's configuration file identifies a port and IP address where the Live Slicer should listen for these API calls. The API commands sent to the Live Slicer can take effect immediately, or within a few seconds. They cannot be used to specify where ad and content boundaries will occur in the future.
-
Slicer API: Use the Slicer API to schedule Live Slicer behavior. This allows you to schedule future ad breaks and content boundaries (e.g., blackouts), specify when new assets should be created, and assign metadata to assets.
-
Live Channel API: Use the Live Channel API to retrieve and manage a live channel's schedule entries.
You must determine whether a live channel may leverage schedule entries upon its creation. Additionally, you cannot enable or disable the scheduling feature on existing live channels.
Certain features are incompatible with live channels that can leverage schedule entries.
Syndication Publishing
Contact your account manager to activate Syndication Publishing.
In addition to streaming content directly to your consumers, you may also simultaneously distribute it to multiple social media and content distribution platforms with minimal effort.
Set up Syndication Publishing by performing the following steps:
- Create a publishing target for each desired social media or content distribution platform.
- Publish to the desired platform(s) by associating the desired publishing target(s) with your
More Information